Leading Edge Inflatable Kite Setup in 7 Simple Steps

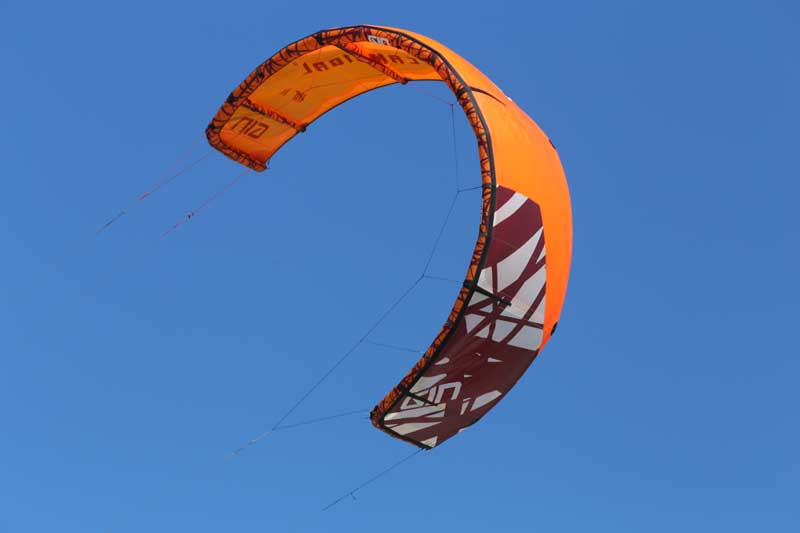
A Leading Edge Inflatable Kite is more commonly known as an LEI kite and is the most common design of kite in the modern kitesurfing world. With these kites you have to inflate the leading edge – thanks to the innovative design of this kite, we can relaunch our kites, continuing our sessions crash after crash, massively aiding the curve of improvement of kiters and the industry entirely.

Where to set up your Leading Edge Inflatable Kite
leading-edge-inflatable-kite-setup

Before you start setting up the Leading Edge Inflatable (LEI) kite, do a site assessment using the mnemonic SHOE to guide you. Are you confident that you’re setting up the correct size kite? You can use this kite size calculation (link) to choose the right kite for your weight and wind speed.
You should set up your LEI kite in an area away from hazards with plenty of space to run your lines.

Setting up your LEI kite

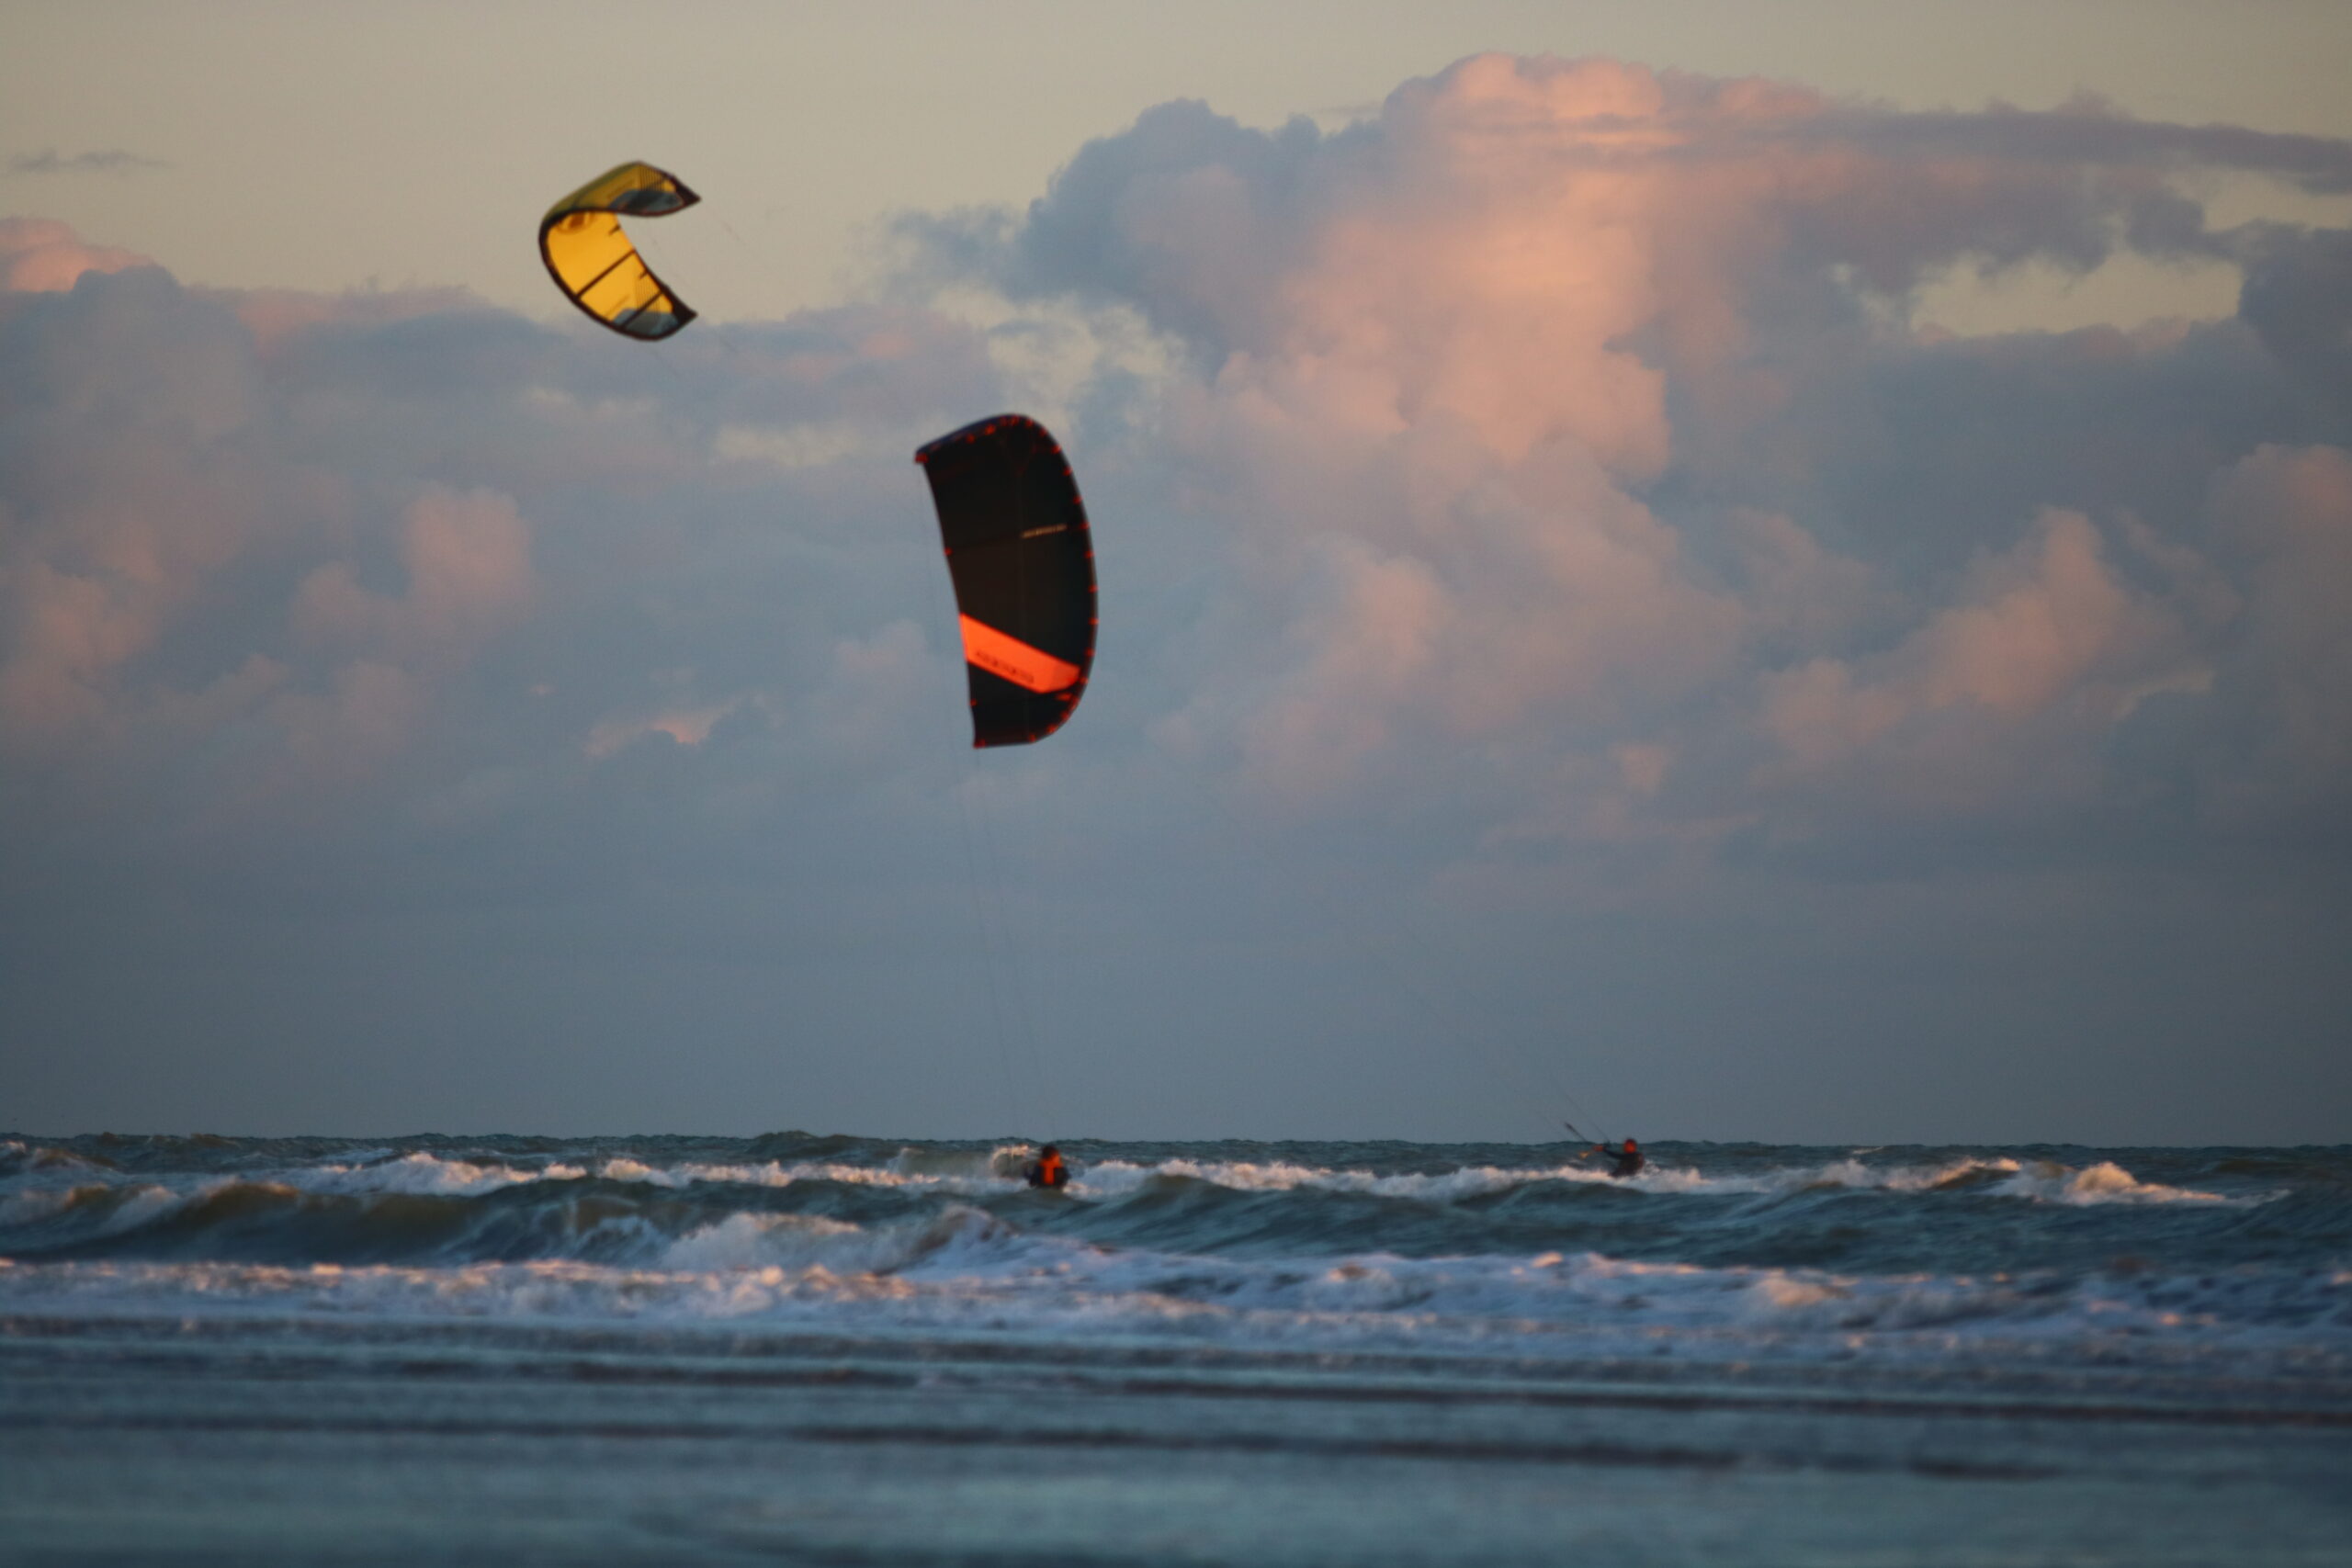
Position yourself to inflate the kite by standing with your back to the wind and the kite downwind of you. Hold the kite by the inflatable leading edge and open up the kite fully before inflating. Connect your harness leash to the kite so that the kite can’t blow away from you with the wind.

Don’t forget to close the deflate valve. Your deflate valve needs to be closed tight so air can’t escape; check for sand before closing. You’ll either have separate inflate and deflate valves or have a single valve that features both inflate and deflate in its design.

Types of LEI kite valves

A standard 11mm deflate valve will require you to push hard to close it. When it’s done properly, you’ll feel it click into place. Put your hand on the other side of the leading edge, underneath the valve, so that you can support it and push hard.

A Boston valve is a 2 layered valve with inflate and deflate separated by a non-return flap. Unscrew the top cap to expose the inflate before you screw in deflate cap.

Some kites use a twist lock mechanism. Duotone and F-one both require their own non-standard pump nozzle to work with their own inflate/deflate systems. Always check that the valve is in the closed position before inflating so the kite doesn’t deflate immediately when you remove the pump nozzle.
Link to duotone pump system
Link to F-One pump system

Pumping up your LEI kite

Your kite will either have multiple points of inflation, or a Single Pump System (SPS). If your kite is multi-pump, start by inflating each strut before inflating the leading edge

Inflate your Leading Edge Inflatable kite with your back to the wind. Keep both feet on the pump at all times, keep your back straight and use your knees so you don’t strain your back while pumping the kite. The kite is inflated properly when it is firm but will bend with mild resistance. Do not inflate over 6PSI while learning. You can then disconnect the pump and close the inflate cap, again making sure it is free from sand.

Weighing down your LEI kite

Park the kite by turning it over then weigh it down so it can’t move with the wind. To turn the kite over, keep your back to the wind then walk the kite over by pressing one wingtip into the sand and using that as the pivot point. Your kite will face directly upwind and the wind passing evenly over either side of the centre strut.
To keep the kite secure, throw a few kilograms of sand onto the leading edge and down towards the trailing edge. Never put stones on your Leading Edge Inflatable kite.

Before you move on to your bar, check each bridle is accessible and untangled, and ready for your lines. Your bridles should come towards you without any twists and pulleys able to move freely. Both bridles will be the same length.

Preparing and connecting your kite bar

Unwind your lines walking downwind from the kite. Lay out the bar on the sand so that it is upside down (red on right for setup) and the depower rope runs straight through the bar.

Separating your lines

Separate your lines by keeping the 2 front (inside) lines between your knees and steering lines outside your knees. Walk up the line length removing any twists and making sure each line runs cleanly to each bridle point without passing around another line. If your lines are especially twisted, run the steering lines to the LEI kite first, then run the front lines separately.

Connecting your lines to your LEI kite

Connect your lines to each bridle connection point. Form the larks head loop and place it over the pigtail. The larks head is made by passing the lines loop end over the section of line directly beneath the loop and pulling the line section through. Once you pass the pigtail through the larks head loop the larks head can tighten against it. Pull tight and double check that the larks head loop is snug against the pigtail knot.

Your kite may have multiple connection options. Have a read of this guide to tuning your LEI kitesurfing kite (link) to choose the best setup for the conditions you are riding in.

Repeat this for each connection point. Double check that each connection is pulled tight and that the lines run straight to the bar and are not twisted over each other. DO NOT try to launch the kite if you are not confident that the Leading Edge Inflatable kite is set up properly.

Do your Preflight Checks


There are many more accidents happening around rushed setup and mistakes made during launching than there are with riders out on the water. We can’t emphasise enough how important it is to double check your actions as you set up and launch your Leading Edge Inflatable kite. Get into the habit of doing a series of pre-flight checks before you launch your kite (link).

  • Is every larks head connected properly? Check every connection is secure
  • Is there symmetry in your setup? Every connection should be the same as on the opposite side of the kite. Match up how you connect the steering lines on each side so that your lines are the same length and affect the kite evenly.
  • Are you definitely set up in the right place? Do you need to move away from hazards, and 3rd parties, closer to the water? Don’t launch directly upwind of objects or people. Move into an open space at least 50m away from hazards.
  • Are your safety releases working? Open your quick release and leash release then rebuild at the start of every session so that you know it is working. Check that your safety line pulls through cleanly.

How do Kitesurf Kites Fly ? A simple 4 piece puzzle

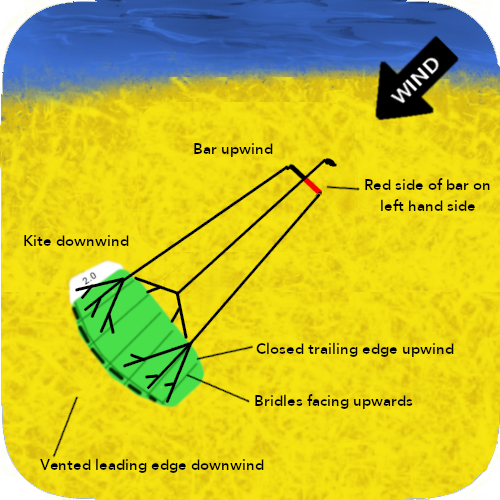
Learning how a kitesurf kite works can improve your kiting abilities. Understand how your kitesurf kite works and what it needs and you could find yourself reading the environment around you, making for the best sessions of your life. Often a good kiter is a knowledgable kiter!

tony-flying-his-kitesurf-kite

How your bar controls your kitesurf kite.

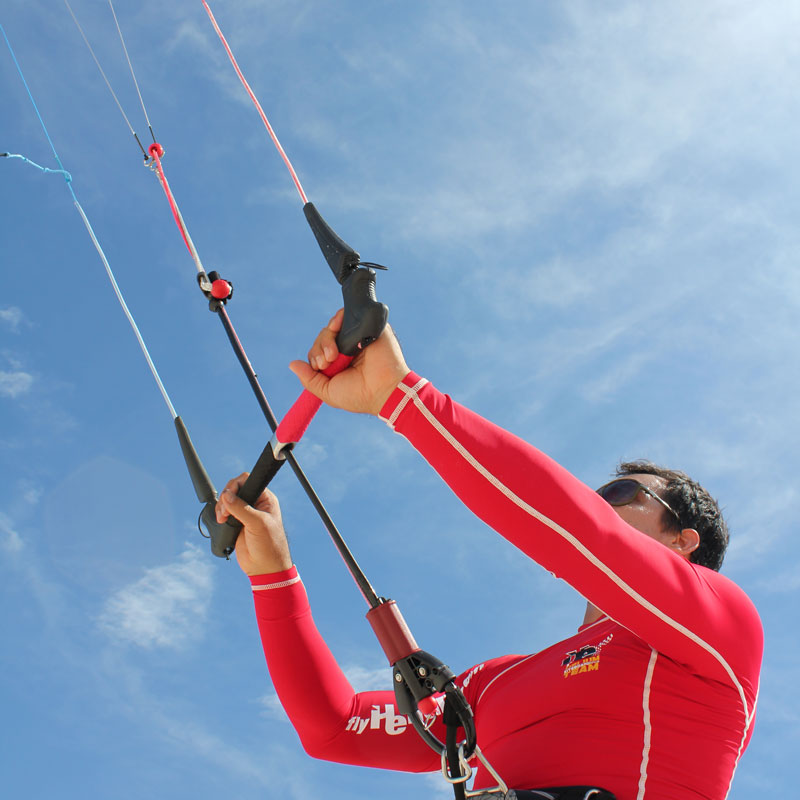
Most modern Leading Edge Inflatable (LEI) kitesurf kites use a four-line bar with two front lines and two steering lines which connect to your kite’s bridles.

The two front lines of your bar connect to the leading edge attachment points and support the force of the kite, but do not control direction. The steering lines connect to the steering bridle attachment points and affect both direction of the kite and the kite’s angle of attack to the wind.

Your kite may have multiple connection options to adjust it’s performance. Take a look at this guide to tuning your LEI kite (link) to understand how you can use these settings.

As you connect your bars chicken loop to your harness, the force of the kite is not felt in your arms but in your core. You are able to control the angle of the kite to the wind by sheeting the bar in or out along the depower throw.

Forces acting on the kite

forces-acting-on-a-kitesurf-kite

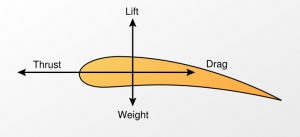
The forces occurring as air passes over and under the kite effect how it flies. Like the wing of an aeroplane, our kite also deals with lift, drag, thrust, and gravity – it also has line tension as an additional force. We’ll quickly introduce these terms before explaining what the effects they have. To keep a kite flying steady the four forces must be in balance.

Lift is the upward force that pushes a kite into the air. Lift is generated by differences in air pressure, which is created by airflow passing above and below the body of the kite. Kites are designed so that air particles moving over the top of the wing, flow faster than the air moving over the bottom. Gravity acts as a downward force on the kite, relative to the weight of the kite. The force of the weight pulls the kite toward the ground.

Thrust is the forward force that propels a kite in the direction of motion. A kite relies on the tension from the lines and moving air created by the wind to generate thrust. Thrust is the reason why the kite will always fly towards the edge of the wind window and won’t stay in the power zone; the kite must fly towards the most upwind point of the wind window.

Drag is the backward force that acts opposite to the direction of motion. Drag is caused by the difference in air pressure between the front and back of the kite and the friction of the air moving over the surface of the kite.

Changing the angle of attack with the bar?

Angle of attack

As the wind reaches the kite, airflow splits at the leading edge of the kite passing over and under it’s surfaces, moving towards the trailing edge, and continuing downwind.

The flow of air going over and beneath the kite reach the trailing edge at the same time. Due to the angle of the kite, the airflow going over the top of the kite must accelerate to reach the trailing edge at the same moment as the airflow passing beneath.

It is this acceleration of airflow over the top of the kite that forms low pressure above the kite and creates lift. The more lift generated, the more it pulls you.

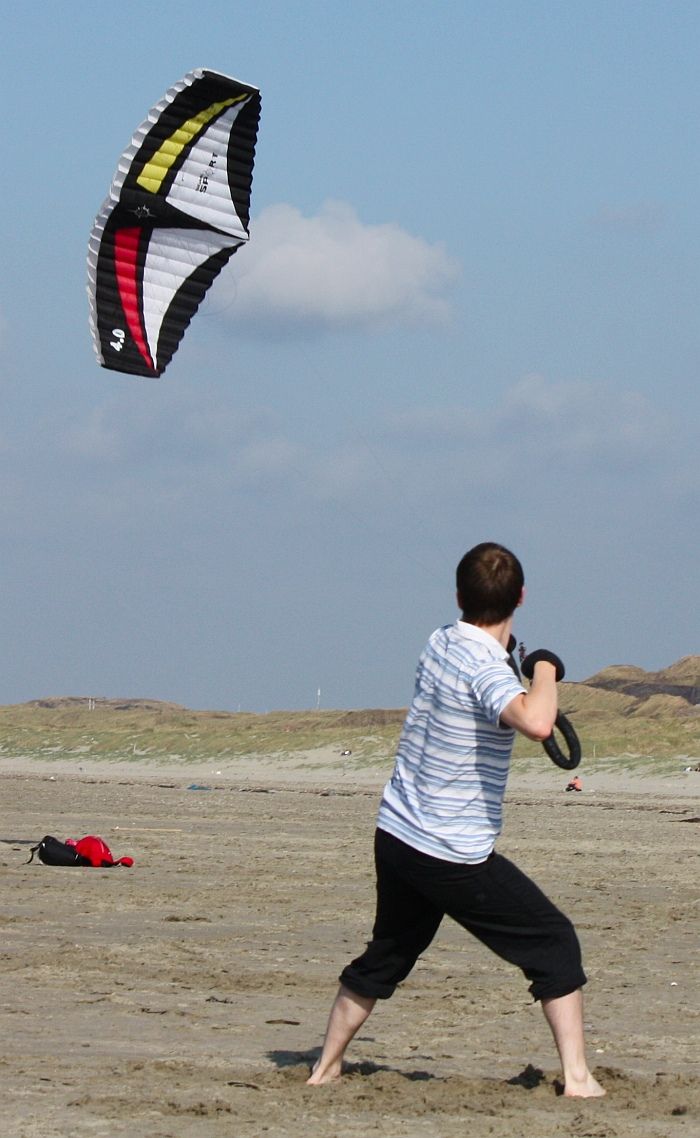
If flying a fixed bridle trainer kite, like the one you use in session one, it’s angle to the wind can only be changed by steering the kite into each zone in the wind window (link). As the kite is flown into the power zone, and the angle of attack is increased, you get the most pull (lift). This is because air is accelerating faster here to reach the trailing edge at the same time as the airflow passing the underside of the kite. You’ll also notice that the kite flies faster through the power zone due to increased thrust.

Sheeting in and sheeting out

If we are flying a depowerable kite, such as the Leading Edge Inflatable (LEI) kite used on the water part of your lessons, the bar can be “sheeted in” and “sheeted out”, pulling the bar closer to us or pushing further away from us along the depower throw. This movement of sheeting on the bar changes the kites angle of attack, giving you additional control over how much lift the kite generates.

Pushing the bar out: (Sheeting out) reduces rear line tension and reduces the kite’s angle of attack so the kite generates less lift. Which in turn pulls the wing tips and the trailing edge of the kite closer to the wind. The result is a tighter turn radius when steering and normally more power, though it is possible to negatively affect the kite by pulling in the bar too much.

Pulling the bar in: (Sheeting in) increases rear line tension and the angle of attack which generates more lift as airflow accelerates over the top of the kite. In this position, the kite generates less power but also has less line tension for controlling direction while steering. With the bar out, the turn radius of the kite will be large and the kite slower to respond to counter steering.

It’s important to remember that this is an additional factor to the amount of lift created by the position of the kite in the wind window. If you steer the kite through the power zone, the kite will still pull you hard, even with the bar sheeted out.

It is possible to “over-sheet” and pull the bar in too far, increasing the angle of attack beyond the kites stable flying range causing unbalanced forces on the kite. When we pull the bar in too far, the airflow over the top of the kite becomes turbulent and can no longer accelerate to the trailing edge to create lift and thrust. This results in an imbalance of pressure above the kite and increased drag. The kite will then “backstall” and fall backwards, instead of flying forwards.

You will be able to recognise when your kite is backstalling as it will feel sluggish, lose power and then fall backwards through its trailing edge. Pushing the bar out will correct this by reducing drag and allowing the kite to fly forwards again.

Our ability to recognise signs of backstalling will enable us to correct our input at the bar and put the kite into a more efficient flying position quickly. A great way to learn this skill is to practice light wind kite flying (link) as you will learn to be more aware of bar position while flying the kite.

Want to know more about the histroy of kitesurf kites? Have a look at this short film about the history of kitesurfing here

NEXT UP: How to launch and land a kitesurf kite

Launching and Landing your Kite Like a #1 Pro

Preflight checks

The moment of launching and landing your kite is the time with the greatest risk and highest chance of an accident occurring. We can’t emphasise enough how important it is to double-check your actions as you set up and are. Doing a thorough kite spot assessment and doing preflight checks will put you on the right track for a successful launch and kitesurfing session.
Here’s what you’ll need to review:

Is every lark’s head connected properly? Check every connection is secure.

Is there symmetry in your setup? Every connection should be the same as on the opposite side of the kite. Match up how you connect the steering lines on each side so that your lines are the same length and affecting the kite evenly before launching and landing your kite.

Are you definitely set up in the right place? Do you need to move away from hazards, third parties, closer to the water? Don’t launch directly upwind of objects or people. Move into an open space at least 50m away from hazards.

Are your safety releases working? Open your quick release and leash release then rebuild at the start of every session so that you know it is working. Check that your safety line pulls through cleanly.
Are you confident you’re on the right sized kite for the conditions? This useful kite size calculation (link) will help you if you’re ever unsure.

Is all of your equipment in good, working condition? Always check throughout your setup for any wear to the kite, bridles, lines and safety line.

here’s a VIDEO for some visual learning

The Role of the Launch Assistant

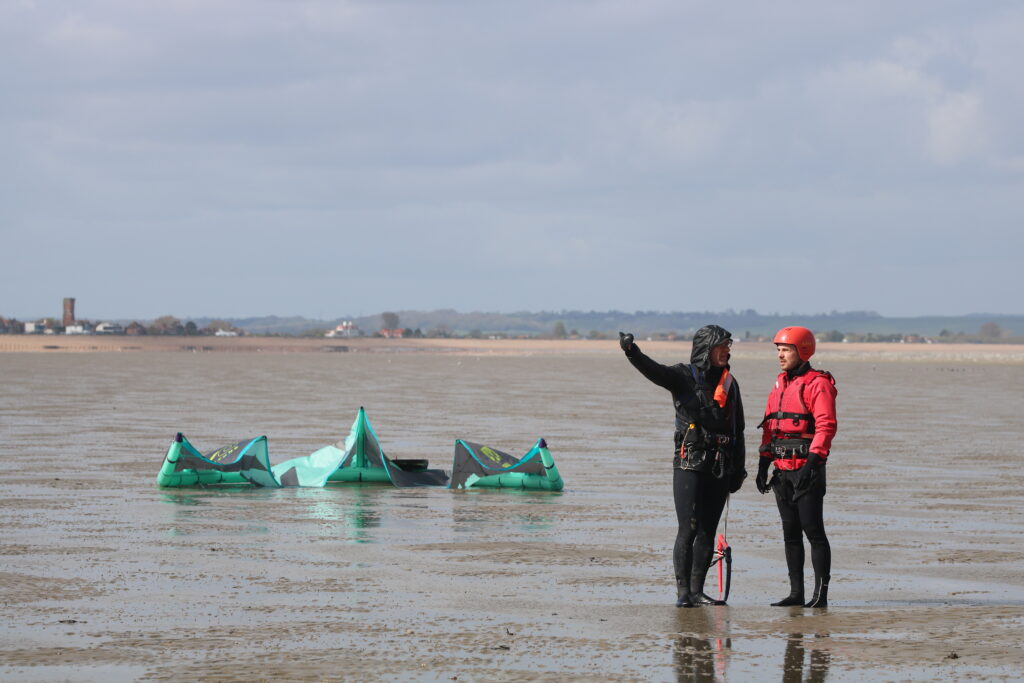
It is the role of the assistant to launch and land your kite; to hold the kite in the correct position to launch and only to let go of the kite, upon your signal, if they are also confident that the launch will be successful. As the assistant holds the kite, they should check the bridles and lines are straight and the kite is in the correct position in the wind window. The assistant will also be checking for any hazards to ensure that the launch area is safe and at least 50m away from any downwind person or object.

As the assistant, if you are ever doubtful that a launch will be successful, DO NOT let go of the kite. Signal to the rider to stop and correct the issue you have spotted.

The assistant will lift and hold the kite in a C shape with one wingtip resting gently on the ground. The leading edge will face upwind, the centre strut will be parallel to the ground. The assistant should have 2 hands on the kite unless using hand signals to communicate with the rider.

Communication signals between rider and assistant

The following hand signals can be used between rider and assistant during launching and landing a kite:

Thumbs up – OK to launch

Show palm – Wait (show this then put the kite back into the parked position on the ground if something is wrong)

Tap on the head – Land kite

Cup hands together and push forward motion from hips – Use bars quick release to flag the kite out on safety line

Positioning to Launch the Kite

Your assistant is ready to lift the kite and hold it in a C-shape launching position for you, but first you need to connect your safety leash to the safety line and chicken loop to your harness with the locking stick in place to make sure it doesn’t drop off your harness. Always connect your safety leash to the safety ring before anything else. Next you need to move into position to launch.

From setup, the kite is upwind of the bar. You now need to move to a cross wind position so that the assistant can hold the kite launch position for you. Walk the circumference of the lines reach to keep lines under tension as you move to the cross wind position. Whenever you launch, you should have the kite closest to the water away from hazards. In the water is the safest place to be, so if you and the rider can be in the water for launch, do it… we call this the ‘wet feet rule’.

Once the assistant lifts the kite into the launch position, you will need to observe the canopy of the kite to see if the angle of the kite to the wind is sufficient that it can fly.

Push your bar away from you. You should never launch the kite with the bar pulled in. Instead, with only one hand, use the widest part of the bar or the float for more leverage while flying with minimal power. This is the top hand as we’re steering the kite up. If the kite is positioned to your right, you’re steering with your left hand (and vice versa for the opposite side).

Is the canopy flapping? If yes, you need to step upwind until the canopy goes tight and you feel gentle feedback from the wind in the kite. Be careful not to step too far upwind. As you step further upwind, you are positioning the kite closer to the power zone. We should be launching our kite in the neutral zone. You can tell if you’re stepping too far into the wind as the pull into your harness will increase and the assistant will be struggling to hold the kite in place as it tries to surge forward to the edge of the wind window.


Never try to launch with too much power. Stop and trim the kite (link) or choose a smaller kite (link).

Are you and your kite in a good position to launch? Have you got your bar out still? Ok, great – communicate this to the assistant with a thumbs up and wait for the assistant to confirm by also showing a thumbs up. Move your signal hand to your quick release so you can act as fast as possible if something goes wrong. Steer gently with your top hand and guide the kite slowly around the edge of the wind window. Don’t steer quickly or cut corners.  If anything looks or feels wrong, signal to wait and sort the problem before launching.

You only need to bring your kite up to 45º (around 10 or 2 o’clock). You don’t need to bring the kite up to 12 as the kite is already on the waterside. You also don’t need to do ‘test jumps’ at 12, you just need to grab your board and get out into deeper water where you’re safest.

How to Land a Kite

Just like launching your kite, landing should also be done as close to the water as possible. Signal to your assistant with a tap on your head then allow the kite to lower slowly around the edge of the window while you control the kite with the bar out. Again, use the widest part of the bar or even the float as the kite gets closer the ground and you need more leverage for steering. Gravity does all the work of lowering the kite around the edge of the wind window, you’re just controlling the pace of the kites descent.

As you slowly lower the kite the assistant will be able to hold the kite by the leading edge. Once in 2 hands, you can walk towards them to get rid of line tension, then walk downwind of the kite.

As the assistant, once you have caught the kite and have it in 2 hands; you can take a step upwind and towards the rider. This will slacken the lines so that you can hold the kite in a U-Shape carrying position.

You can now move away from the water, put the kite down in the parked ‘setup’ position and weigh it down again with sand.

NEXT UP: How to water relaunch an LEI kitesurfing kite

No sliders selected. Edit this page and select a slider in the Crelly Slider editor block.No sliders selected. Edit this page and select a slider in the Crelly Slider editor block.

Choosing The Right Kite Size. First Time. Every Time.

kite-size

This is often one of the very first questions I get asked on the first day of a course, which is reassuring as it is a fundamental consideration when choosing what equipment to take and set up. If over looked, this can put both the rider and others in considerable danger. Kite sizes range from a tiny 3 meters to a huge 20 meters, and kitesurfers will be out riding in conditions from 6 knots to 50 knots, so there’s certainly plenty of sizes to choose from. How to choose the right sized kite revolves around the combination of 2 factors – the wind speed and the rider’s weight.

The Kite Choice Equation

This is an equation The Kitesurf Centre instructors often use when choosing the right sized kite for their lesson. It takes the wind speed, weight and ability. See the full break down of each below. The important part is wind speed, as you’re likely to know your weight and ability fairly accurately, but wind speed is a guess at best if you don’t have the technology to accurate measure it. So always lean on the side of caution and go with a smaller kite if in doubt.

Rider Weight / Wind Speed x Ability = Kite size

Rider WeightWind SpeedAbility=Kite Size
70kg20 knots1.8 (beginner)6.3m
70kg20 knots2.1 (intermediate)7.35
70kg20 knots2.3 (independent rider)8m

The equation can be used until you’re comfortable choosing the correct sized kite. It generally brings up a smaller kite than needed for the conditions, which is ideal for learning. Play around with the numbers and find something that works for you and your ability, then stick to it.

Wind Speed

Before you arrive at your kite spot you should have an idea of what the wind forecast will be. Online sources such as Windguru and XC Weather will provide you with a good indication from within 2-3 days. What’s the basic rule with kite size and wind speed? I’m sure you guessed it. As the wind speed increases, the size of your kite decreases, this being the most effective way to moderate the kite’s power. This is the same in both windsurfing and sailing, where you put on a different size sail, or reduce the sail’s surface area, also known as reefing. Let’s assume an average riders weight of 80kg, and see how this stacks up in different wind speeds.

Wind Speed (knots) 8 – 15 15 -25 25 – 40 40 +
Kite Size (m²) 15 – 12 12 – 9 9 – 6 6 –

Kite Wind Range

As the wind speed goes up, the kite size comes down. You’ll also notice that different sized kites can be used in the same wind strength. That is because each kite has a wind range. For example, a 9 meter can be ridden in anything from 15 to 30 knots. This varies with each type of kite, influenced by the canopy profile and the bridle system. Bow kites have a good wind range, partly because the shape of the kite allows for a lot of de-power from the bar. C kites on the other hand, partly due to their narrow wing tips, have a much reduced de-power function, and therefore don’t have such high wind ranges.

Rider’s Weight

One of the great things about kitesurfing is that a student or rider’s weight bares little significance, though adjustments need to be made somewhere, and the kite is the obvious choice. A little like a car, the heavier it is, the more power is needed to get it going, though this consideration is not nearly as significant as to how wind speed affects the kite size, and is also a little murkier to define.

This is how I play it – take a look to see what is the most common sized kite being ridden, and take that as the average choice; the size of each kite is usually written on the wing tips. Assuming 80 kg is the average rider weight, you add or subtract 1 meter of kite size for every 10kg you are above or below that average weight. So if most riders are on 12’s, and you weigh 110kg (30kg more than 80kg, therefore +3 meters), you’d go out on a 15, or if your weight is 50kg (30kg less then 80kg, therefore -3 meters), you’d be better on a 9.

Like I said, not so easy to define, and actually you’ll be surprised at how quickly your kite size choice will become second nature to you, being more a familiar feeling rather than high maths. There are formulas and charts available online, though these are intended as guidance only.
So those are the two main considerations when choosing your kite size. What are the more subtle, though by no means subtle, variables?

Kite

As already mentioned, kite type does make a noticeable difference. I tend to ride on C kites, for no particular reason, and these generate power in a different way to bow or hybrid kites. C kites generate pull more from forward movement rather then catching the wind – again with the car analogy, more like an Italian sports car rather than a chugging American V8. So when most riders are out on 9 meters, I’m maybe out on a 12, or if they’re out on 6’s, I’m on my 9. The majority of riders fly hybrid kites, which is halfway house between a bow and C kite.

Board

As with the kite, board type makes a difference to a rider’s kite size, and this relation between board and kite is often a measure of the board’s efficiency. The more efficient a board is, the less power required from the kite, and therefore the smaller a kite can be used. For example, often to assist students with getting up on the board, larger twin tips tend to be the choice, as these have a lower planing speed. As such, a smaller kite, can be used, which is the safer choice for those with little experience on a kite.

Another example is with wave riding. This is a style that is, as the name suggests, as close to surfing as a kitesurfer will get, and as they use surf boards, smaller kites can be used. This works well as smaller kites are more dynamic in flight and faster on the turn, which is ideal when ripping up and down waves.

Riding Style

As riders progress down the line, they tend to fit into a style of riding that they most enjoy. Some like to cruise whilst others like to catch big air. The current world record holder is Mike Mac Donald, setting a record of 33.9 meters. Pretty high! For those seeking such fame, going out slightly over powered, or ‘lit’, on large kites will maximise their jumping potential. This is referred to as boosting. In contrast, those who’d rather cruise comfortably will choose a kite size that is down the middle for the wind strength.

All this begs the question –

How Many Kites Do I need?

When you buy your first, we recommend a kite size that will suite the most common conditions that you’ll be progressing in, whilst taking into account your weight. This tends to be a size from 9 to 12 meters. As you develop, and start to explore wind speeds either size of this, you’ll need to invest in more kites, and the riding style you choose to pursue will define the type of kites these will be. Most riders find that 3 kites is enough to suit all conditions, some choosing even more to increase their wind range further.

Some Final Words

How to choose the right sized kite is fundamentally about your safety, and as long as you follow these steps, you’ll be safe.

  • Always turn up to your session knowing the forecast, and make sure you take a kite that is realistic for this wind speed. Make sure you’ve got plenty of time between tides, darkness, friends and family.
  • Choose your kite size based on your own knowledge and understanding of your kite. Always take a look to see what size others are riding on.
  • Setup your kite with time and patience. If it doesn’t look or feel right, it probably isn’t, so disassemble and start again.
  • As with anything in kitesurfing, if you are unsure, ALWAYS ASK another experienced kitesurfer – there is no substitute for the experience and advice of others. We at The Kitesurf Centre are always around to give advice and guidance.

As I said, with a bit of time, this will become second nature to you. See you out on the waves!

NEXT UP – How to Self-Launch

How Many Lessons Do I Need For Kitesurfing?

One thing for sure is that if you want to get into kitesurfing you need to have lessons. Thankfully, learning how to kitesurf is great fun. The process is broken down into simple steps, such as learning theory, developing kite flying techniques, and introducing the board, and these processes are taught in a way that is both informative and engaging.

Why Have Lessons?

Although kitesurfing is a perfectly safe sport, the potential for things to go wrong is considerable, so it is always necessary to have lessons to ensure that you learn how to use the equipment correctly, you develop the correct techniques, and you understand the procedures and when to use them. Of course not everyone follows this rule, and here at Camber Sands these cowboys stick out like sore thumbs. We call them Ebay-ers, as they tend to get hold of some kit online, setup according to what seems to make sense, and then what happens next is anyone’s guess. As you are reading this blog I take it you’ve decided to have lessons. Well done!

What’s The Minimum Number Of Lessons?

I always recommend a 3 day course as good introduction to Kitesurfing. The course begins with the basic theory that surrounds the sport, with particular focus on what set of conditions you need for kiting. Then it’s straight on to the practical side, with flying small kites on the beach to explore the wind window and develop good flying technique. Quick bite to eat, into wetsuits and introduction to the bigger LEI kites, including safety. … more information on what’s involved here – https://www.thekitesurfcentre.com/kitesurfing-school/3-day-course
And Then?

These 3 days will give you a good understanding of kitesurfing, and depending on your ability to learn, you may even be up and riding on the 3rd day. After this, I would recommend 2 more days of instruction as a minimum, and this can be done by either extending your group lessons, or booking in a couple of 1 to 1 privates. In these lessons the instructors will take a more passive approach, giving you room to apply your knowledge as if you were an independent rider, whilst providing corrections and tips where necessary. This helps to secure the processes in your mind, and allows us to asses you to see if you’re ready to head out on your own.

What’s the maximum?

Of course, there is no limit to how many lessons you can have. Everyone learns in different ways and at different paces. Here at The Kitesurf Centre we’ve had students that are still having lessons three years down the line. Sometimes it’s more enjoyable to have the company of an instructor, and because there is no real limit to how far you can develop as a kitesurfer, there is no limit to how many lessons you can have. What is important is that when you decide to become an independent rider, both you and your instructor are sure of your ability to remain safe.

So what can you bring to your lesson?

Previous Experience

A question we get asked a lot is does previous board or wind experience effect how long it takes to learn. The short answer is yes, and no! Students who have experience in other board or wind sports, particularly snowboarding, tend to be more able at grasping certain aspects of learning, for example applying the board during board starts. This is perhaps unsurprising, however, the kite is the levelling factor. Flying LEI’s is a new experience to almost all students, and as kitesurfing is 10% board, and 90% kite, every member of the group is pretty much at the same point of development when it comes to kite flying.

Psychology

I would say the most significant point which will affect how long you are learning is your own approach to lessons. When I first learnt I remember thinking I was going to extract every ounce of experience and knowledge from my course – after all I had paid for it! So I made sure I turned up on time, paid attention to my instructor, and really gave the practical elements all I could. I even took notes! On my 3rd day I was up and riding, and it was a truly memorable buzz. Of course, from time to time we do have students who don’t pay much attention in their lessons, and don’t apply themselves to flying the kite or riding on the board. As a result they don’t develop as quickly as others, and seldom enjoy their lessons. So if you’re gonna learn, go for it!

Time

A good approach in terms of time to learn, is to commit a season to it; this summer I’ll learn how to kitesurf. In a perfect life we’d have all our lessons together, one after the other, but of course lift isn’t like that, and the teaching process is often peppered with life’s other commitments. This is not really a problem, and often a break after a lesson allows you to reflect on the day, and help to consolidate what you have just learnt. If you’re booked into a group lesson, here at The Kitesurf Centre we organise every day to fit in with your requirements. What can really help to retain knowledge between lessons is to keep revising using books and online sources of information, and if the kite flying was a bit of a sticking point, buying a small foil kite to practice with is a great idea.

Different ways of learning

There are different ways to learn how to kitesurf, and some students respond to certain methods better then others.

Group Lessons

Most students are taught as part of group, and this is the best way to get off the ground. It’s always reassuring to begin something new with others who are in the same boat. The opportunity to make new friends and learn off each other’s interpretation is a fun and effective way to learn. Of course, this means that compared to a private lesson, you spend less time on the kite and with the instructor, but again, this helps students to learn. As previously mentioned, much of the learning occurs when you are not directly engaged with the kite or board, enabling you to reflect on the experience, and also to learn by observing the techniques of your fellow group mates and to discuss and critique. It certainly makes the lessons more fun, and perhaps most importantly for kitesurfing, it teaches you to be patient, and communicate with fellow riders.

Private Lessons

Private lessons are a great way to learn if you have something more specific in mind, for example learning how to ride toeside, or how to ride upwind. These enable you to have the instructor’s undivided attention, allowing them to focus on the more particular details of your technique. These lesson tend to be more intense and shorter, and are a great way to progress in the sport once you’ve been taught the fundamentals.

Holidays

If you want your Kitesurfing tuition to be involved in a more rounded experience, we provide holidays to warmer climes, where tuition is part of the package. This is a great option if you want to blast out a solid course, whilst taking in the cuisine and culture of somewhere a little more exotic. All equipment is included, and you just need to turn up to the airport in your wetsuit or speedos. More info here – https://www.thekitesurfcentre.com/kitesurfing-holidays

Conclusion

So how many lessons do I need for kitesurfing? Minimum 5, and maximum – however many is necessary to make you safe in the water with a kite. Your preferred method of learning will most likely become apparent on your first course, and can therefore be applied at it’s conclusion. Kitesurfing is not a hard sport learn, and as mentioned at the beginning of the blog, the best part of it is that it is all good fun! Give us a call to discuss.

Other reading –

 Is Kitesurfing Easier Than Windsurfing?

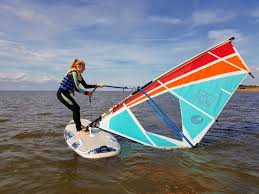
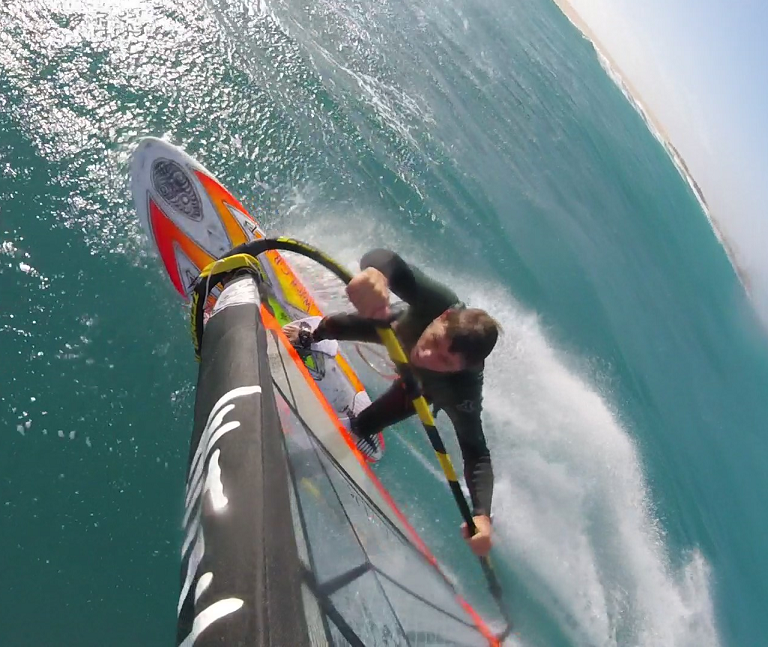
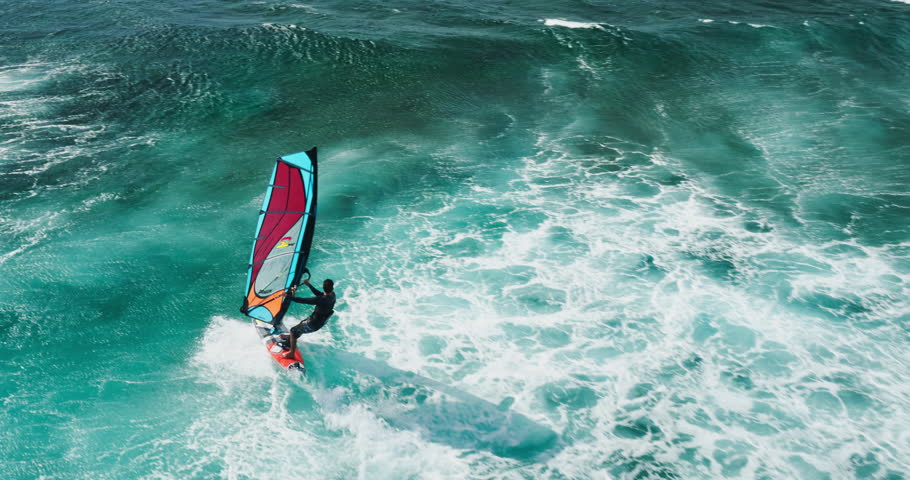
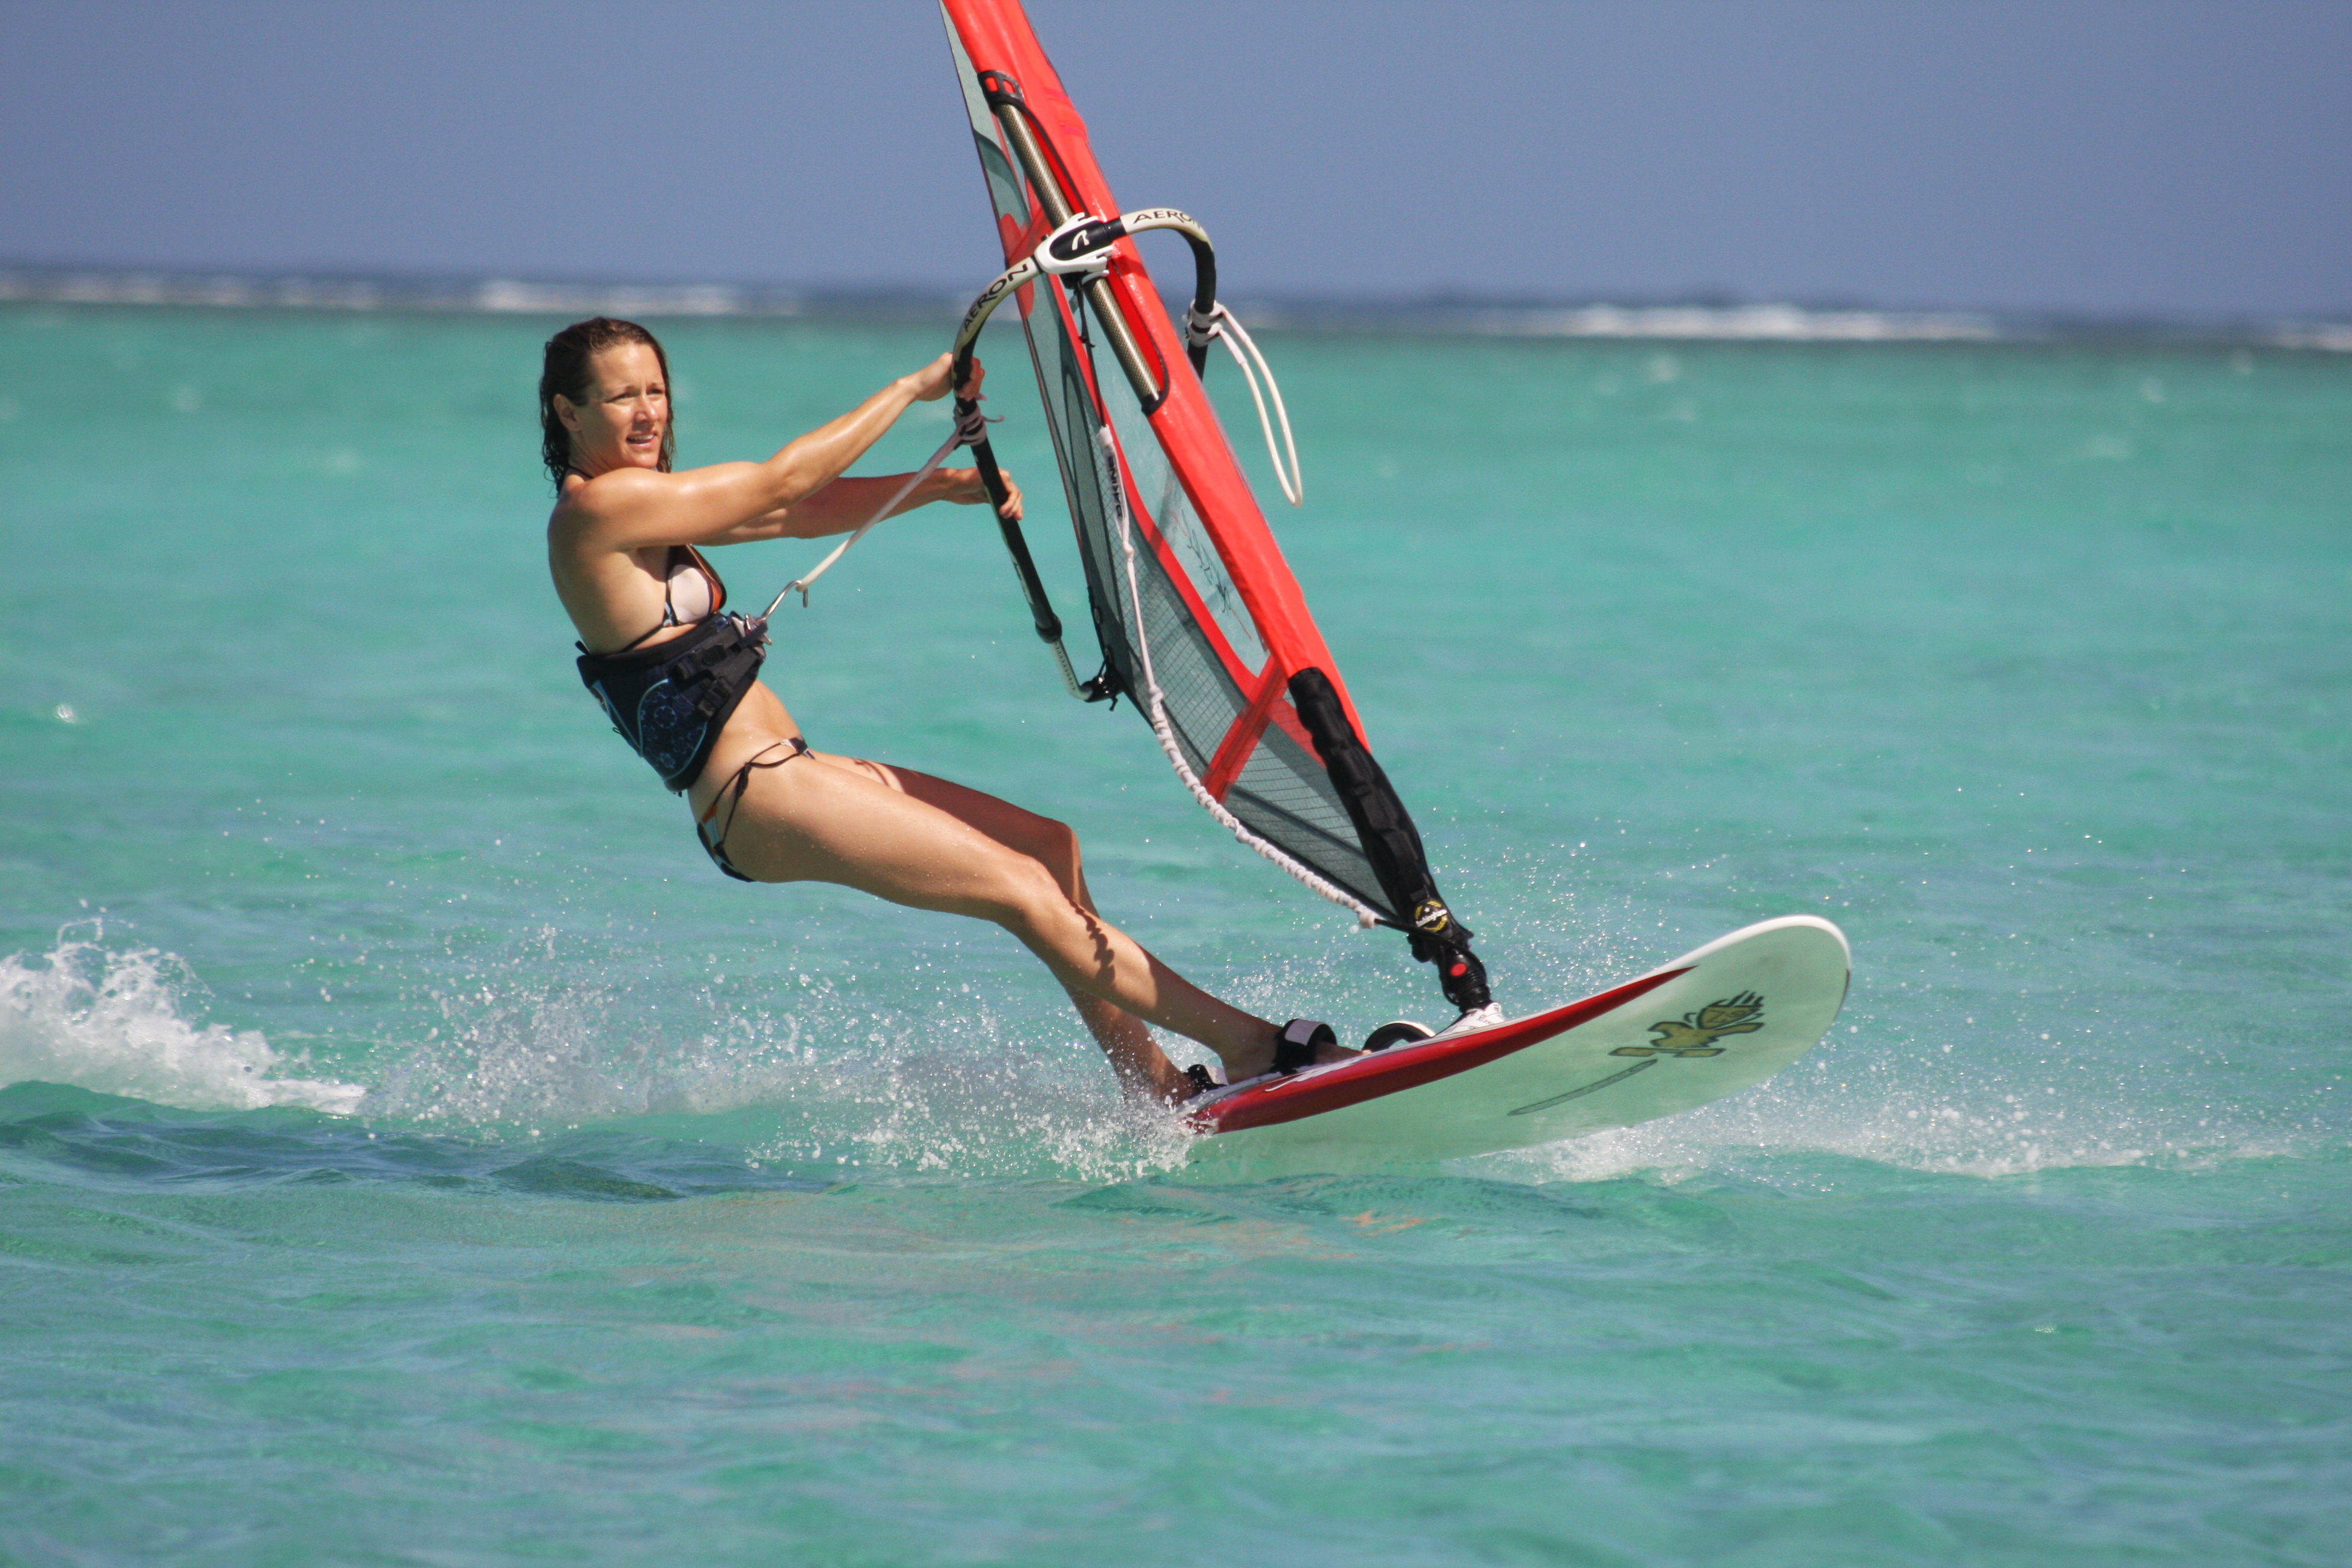
Often when you look out and see kitesurfers on the waves, you’ll also see windsurfers in the mix, so this seems like a rather logical comparison. Indeed, when you look into the history of kitesurfing, you’ll see that it owes a lot of it’s development and progression from the world of windsurfing. When kitesurfing was in it’s infancy, mainly in the 90’s, it exploded onto the watersports scene with its visual splendour, lofty kites and big jumps. This tempted many windsurfers to jump onto the wagon, and so naturally some of the big windsurfing manufacturers followed, with perhaps the most notable example being Naish. Many who now enjoy kitesurfing started out as windsurfers, and still mix up the two disciplines that have their fair share of differences. So if your looking into getting into a wind powered watersport, which is right for you? I’ll break it down into learning and developing curves, with some safety discussion, ending with a little about the equipment.

Learning

Generally speaking, learning to get up and ride is easier with windsurfing, and most beginners will experience the thrill of windsurfing on their first lesson. This is almost entirely due to the fact that the equipment is more user friendly, taking less instruction and time to grasp. The sails on a windsurf are simple to use and are held up by the riders arms, whilst with a kite there is more involvement with it’s control, keeping it flying and prevent it from falling out of the sky.

Another significant point is the buoyancy of the boards. Unlike a typical kitesurfing board, a windsurfing board will float with a riders weight, requiring no forward motion to keep it above the water surface. This means that a student can step up onto the board, sheet in the sail, and get moving with little coordination or effort, though some balance. The equivalent moment in kitesurfing is a bit more of a crescendo, where the skills that have been learnt over the previous few days are bought together in what is known as a board start. This is where standing and a forward motion are combined momentarily to hopefully make a kitesurfer.

So in terms of getting up on either a kitesurfing board or a windsurfing board, windsurfing is easier. However, this is where the advantage stops.

Development

Assuming you wish to return to your car at some point, you’re going to have to be able to come back the way you came, and with kitesurfing you simply send the kite the other way and swap the back of the board for the front by shifting your weight; there is no need to turn it around. As windsurfers use directional boards, or boards that only go one way, riders must turn the entire rig around, and this involves much dexterity and skill to master. It is also necessary for the rider to rotate around the sail, which when seen being done, is impressive.

The bit in between is pretty relaxed on both. When cruising in a straight line, the key is to trust your harness, learn back against the pull of the sail or kite, and enjoy the ride.

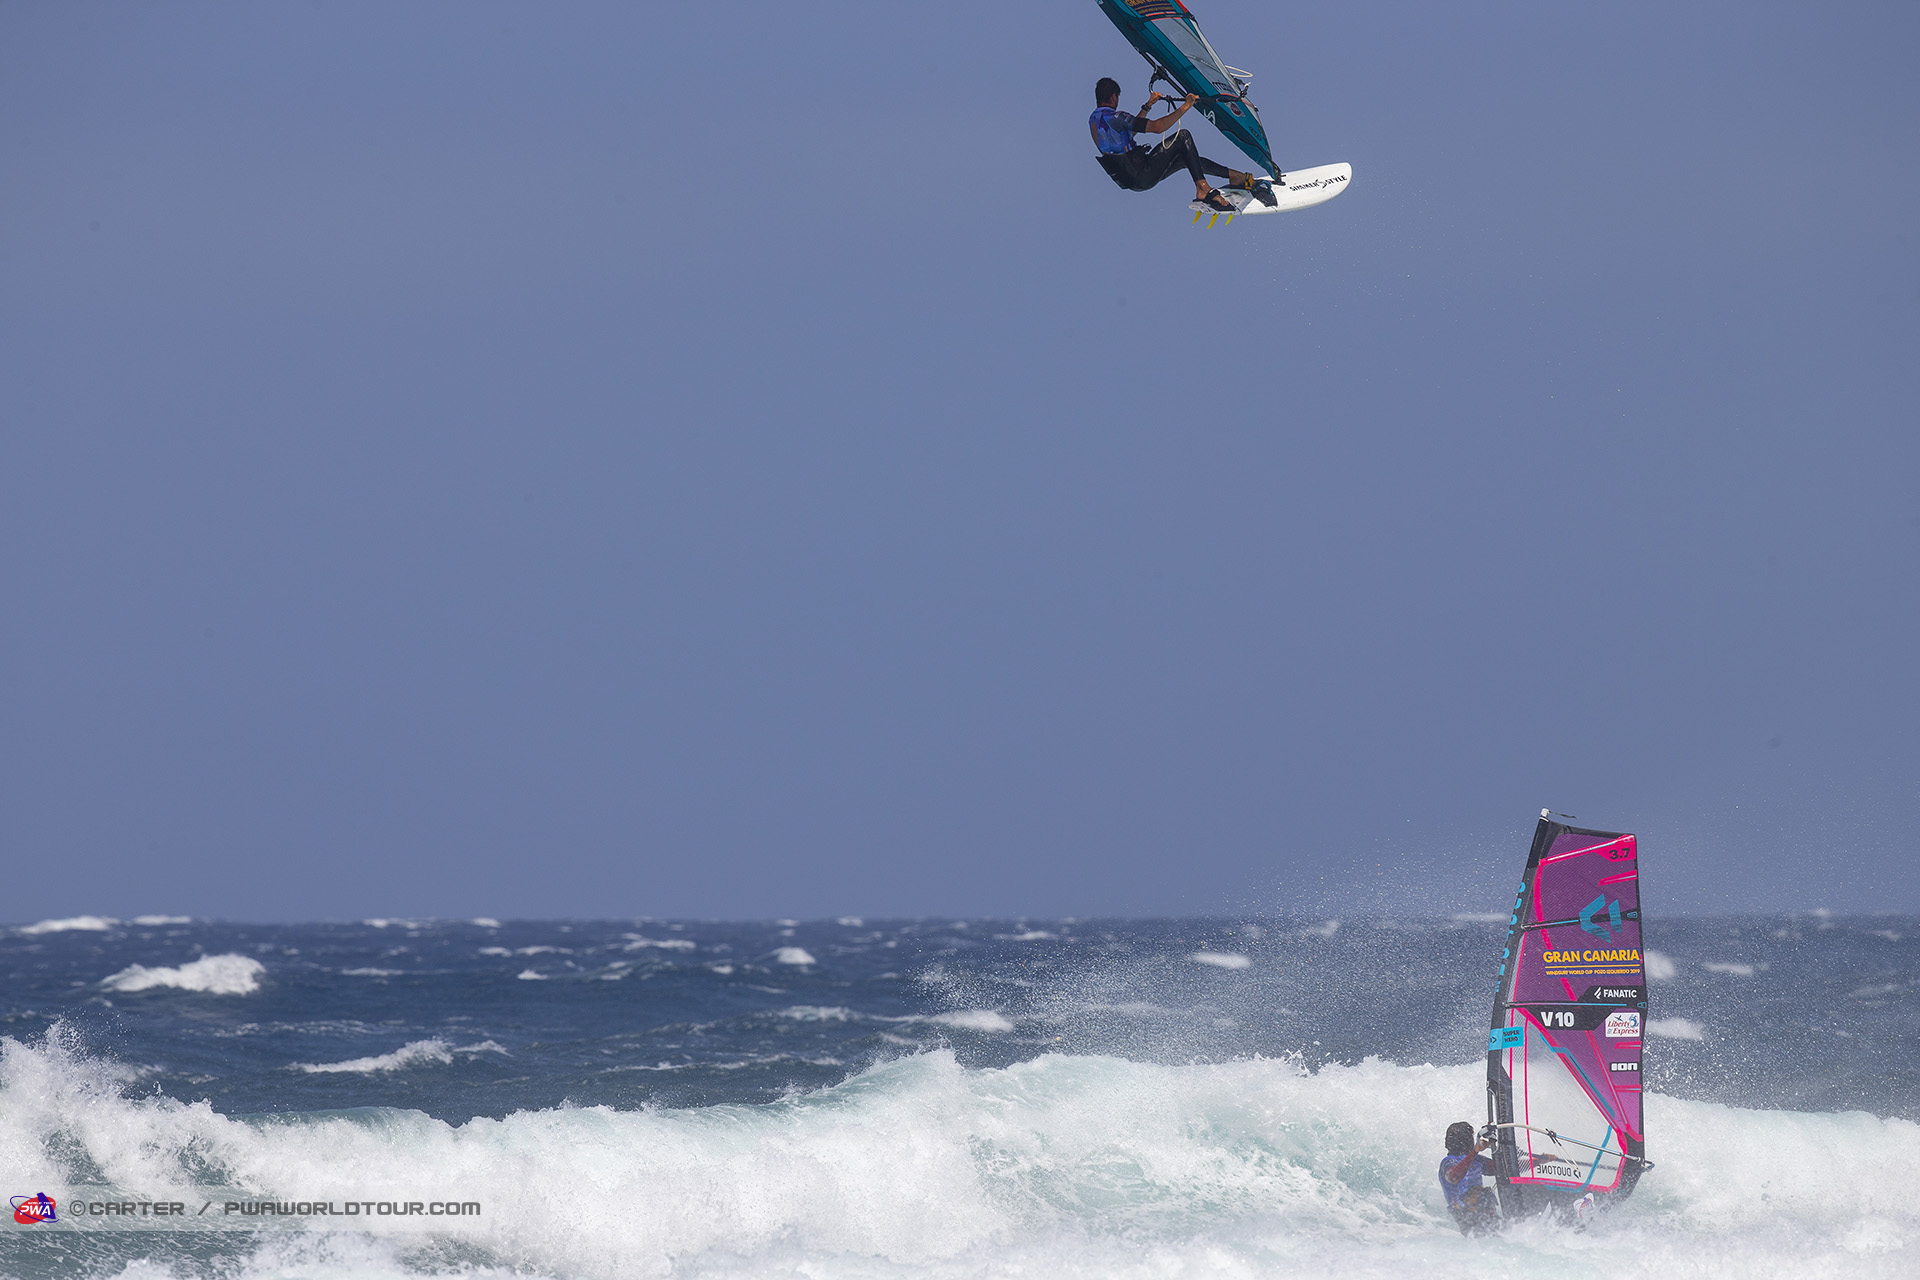
In terms of tricks and treats to develop into, kitesurfing comes out on top, this largely due to it’s smaller board size, the distance of the kite to the rider, and the impressive jumping potential. That’s not to say that windsurfers can’t get some serious air and do some head spinning flips with some strong wind and decent waves.

Fitness

Mainly due to the reasons explained in the development section, windsurfing does require a reasonable amount of strength. Sheeting in, and lowering and raising the sail, which is necessary when on the turn, requires a good bit of core grit. Kitesurfing in comparison has a lighter touch on the control of the kite, as almost all of the power is directed through a waist harness, and there is no need for any complex rotations when changing direction. As such, kitesurfing has no prerequisite for strength or fitness. Being a competent swimmer is essential for both.

Safety

The key here is knowing how to use the equipment correctly; as long as this is guaranteed by the rider, both of these sports are safe. The potential for things to go wrong is greater in kitesurfing. This is mainly because the power source is 25 meters away from the rider, as opposed to directly in front. In windsurfing you can simply let go of the sail to de-power. The process in kitesurfing is also very simple and effective, but if it the process is not understood correctly, or is disabled due to a bad setup, the consequences can be considerable. That is why having lessons is a must; so the student can learn and practice these procedures in a controlled, risk free way.

The gear

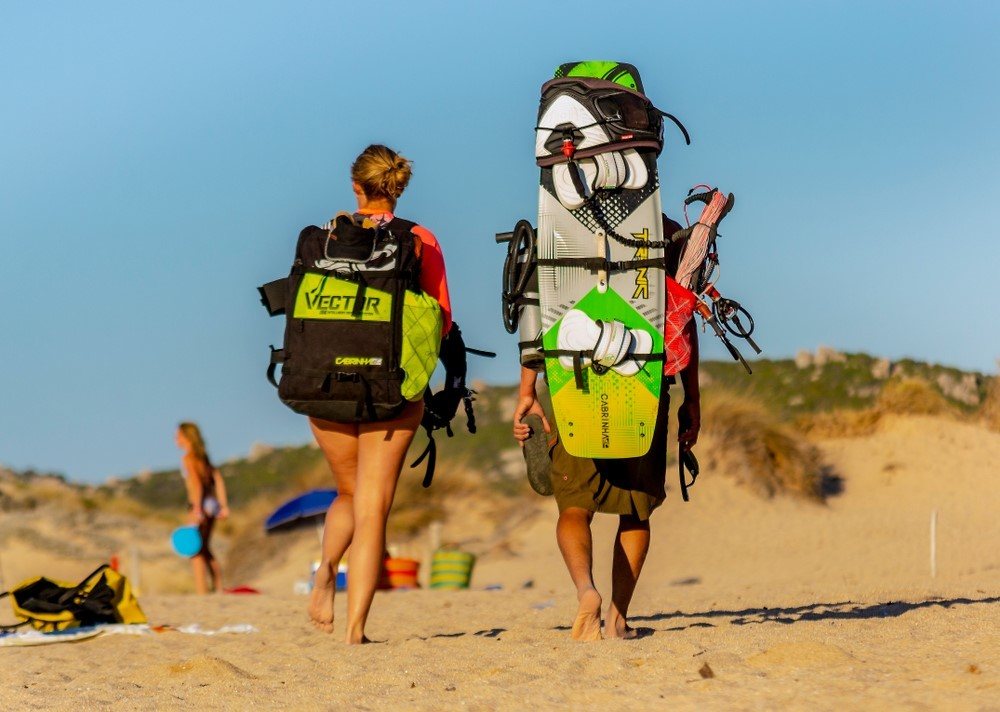
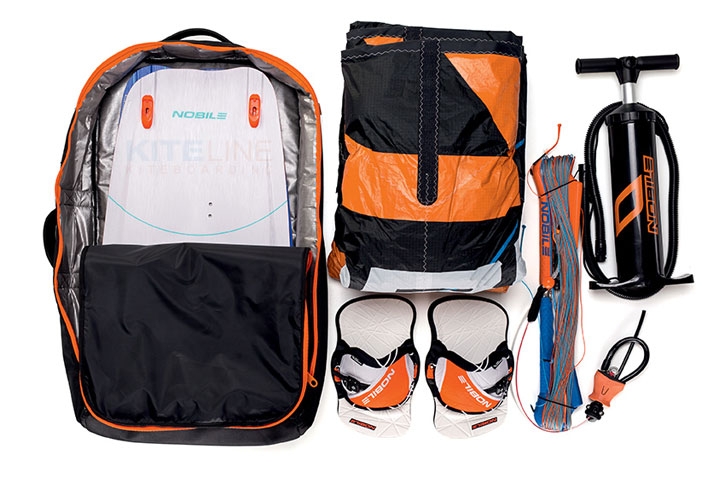
So what about the gear? This is where kitesurfing really shines. Everything that you need can be simply packed down into a large backpack, slung onto your shoulders and taken back on the bus. When broken down a windsurfing rig is more considerable and necessitates the need for a van or sizeable car. Of course this won’t be a problem if you have one of these.

Conditions

Both sports require the same set of conditions. With the recent advent of ultra light foil kites and super efficient boards, kitesurfing can be done in winds as low as 8 knots, and windsurfing claims similar speeds of winds as a minimum requirement. Onshore winds are the sensible choice of direction, as are spacious beaches that have been specifically designated for such sports. Windsurfing is not so dependant on low tide as these is no landing or launching procedure, though low tides are a good idea as a safety precaution. They do need to be able to walk in the sea to get their craft deep enough to ride.

To Conclude

So the answer to the question is kitesurfing easier than windsurfing is a little like the skiing/snowboarding comparison. Windsurfing, like skiing, is easy to get going on, but more challenging to develop in, whilst kitesurfing, like snowboarding, is trickier to get riding on, but easier to progress in once you start putting in turns and developing a more dynamic ride. Both these sports are an absolute blast, as what they both come down to is shooting across the surface of the sea at wicked speeds – I don’t think to call that biblical is an exaggeration.

Intrigued? Here’s some more reading you may find interesting, and a link to our videos page.

Kitesurfing/Snowboarding/Surfing/Windsurfing Comparison & Crossover

Any guesses on what all these sports have in common? I’ll throw skateboarding in the mix for another clue. You probably guessed it – they’re all board sports, and are all great fun to learn and do. So how are these sports similar, and how are they different? After all, some you can do locally, some you probably can’t, some are easier to learn then others, and some are more expensive then others. It’s a very broad question, and one I’ll attempt to answer by discussing the fundamental considerations of each. Here we go for a Kitesurfing/Snowboarding/Surfing/Windsurfing comparison & crossover!

The Basics

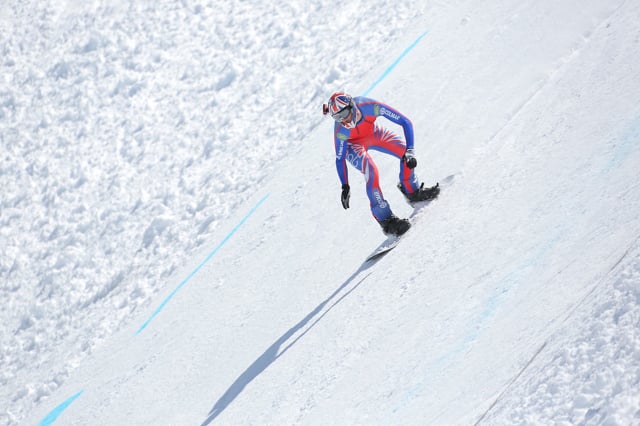
Let’s talk about the riding surface. Again, any guesses on which one is the odd one out? You probably guessed again. Snowboarding. Kitesurfing, windsurfing and surfing all take place on the water, as denoted by the term surf. Snowboarding takes place on snow, which provides a very low friction surface to gain some very fast speeds on – heads up to our own Rupert Cawte, who clocked an amazing 151 kph to match the British snowboarding speed record. And for kitesurfing? Links for both of these at the bottom of the page.

Secondly, propulsion. This splits the field down the middle. Both windsurfing and kitesurfing use the wind to propel rider across the sea, whilst snowboarding and surfing rely on gravity to either pull the rider down the mountain, or down the face of a wave. This makes for an interesting ride dynamic. Both snowboarding and surfing are what I call stop and go sports, with sessions being peppered with chair lift rides or wave seeking, whilst windsurfing and kitesurfing, providing the wind plays ball, are more or less a constant ride. So snowboarders look out for snow, surfers check the swell forecast, and windsurfers and kitesurfers are looking for a good wind forecast.

Learning

One of the beauties of all these sports is that they all relate in terms of board control. Simply put, if you lean the board left, you turn left, and if you lean the board right, you turn right, much like a skateboard. This technique is key across all the sports as it decides you direction of travel, is a way of controlling your speed, and very much adds to the fun factor. Great!

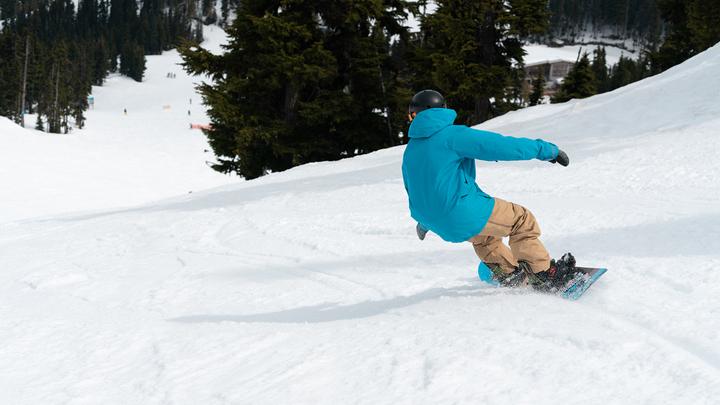
This means that, generally speaking, if you’ve learnt one of the sports, it’s easier to learn another. A great example of this is kitesurfing and snowboarding. Due to my experience as a kitesurfer, and specifically my ability to ride toeside, I was able to apply these techniques to snowboarding, and after an afternoon of steady progression, I managed to get down the mountain looking like a snowboarder – to my relief frankly.

Fitness

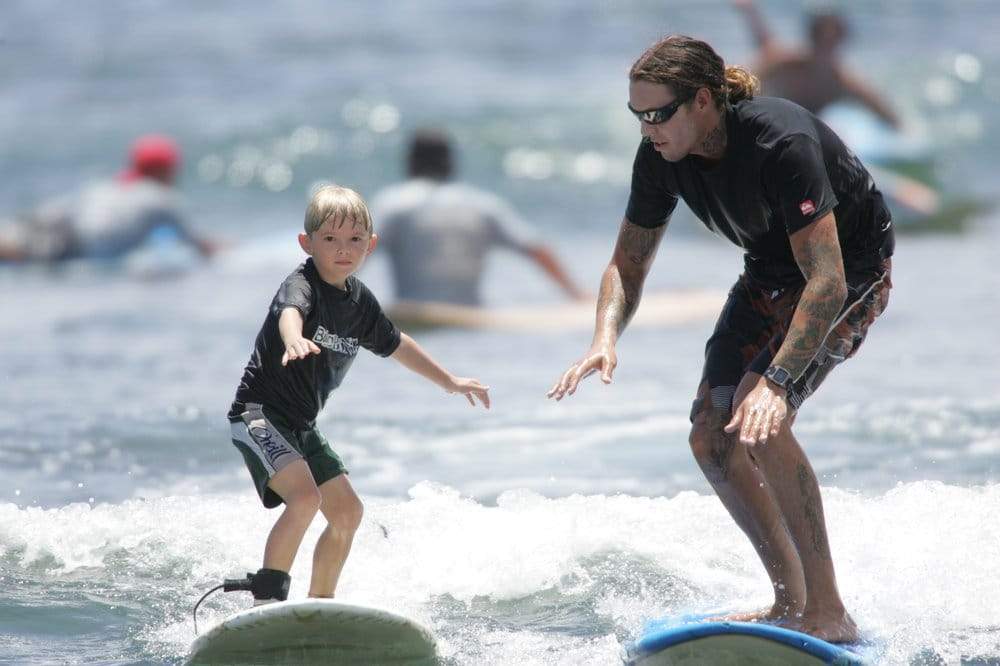
We have another odd one out here. Perhaps, not so easy to guess, this is surfing. Surfing requires a high level of cardio and core strength. Paddling back out to catch a wave, and paddling onto a wave requires both, whilst once on the wave, you have to pop yourself into a standing position, ready to make the turn into the wave. In decent surfing conditions, the environment is demanding, as tides, wind and underwater hazards are thrown into the mix to add to the challenge, but also the fun.

Next in line for fitness I would say is windsurfing. Lifting up the sail, sheeting in, and changing direction requires a reasonable amount of agility and strength, particularly in the upper body, though once hooked into the sail via a harness, cruising is pretty easy peasy.

Both kitesurfing and snowboarding are easily accessible, with neither requiring a particular focus on strength or fitness; gravity and wind do pretty much all the hard work! Again, as long as you follow the prescribed routes into these sports, fitness shouldn’t be much of any issue. Of course your body will adjust according to the demands that you place on it, and you will develop the fitness required as you learn.

Practicality

How practical is the sport to you? Are the right conditions easily accessible to you? How easy is it to ship the equipment around? As an example, here in Camber sands, both kitesurfing and windsurfing are logical choices of board sports to pursue. We have good beach access, plenty of reliable wind, and a well established community of wind sports-ers to join.

Surfing, on the other hand, is not a good choice. It’s not often that we get the perfect storm necessary to make good surfing waves. As is well known, this discipline belongs to the more westerly coasts of the UK. As the channel gives way to the Atlantic, there is plenty of fetch to enable good waves to develop, whilst these coasts are more exposed to receive the rollers coming in from the Atlantic.

Snowboarding of course can only be done where there is snow, making it very much a seasonal pursuit and requiring the need to fly, though any nearby dry slope can do a pretty good job at replicating the sensation.

OK, half way house in our Kitesurfing/Snowboarding/Surfing/Windsurfing comparison & crossover!

The Gear

The beauty of kitesurfing is that all the gear can be packed down into a sizeable backpack, with folding boards available to further reduce the size. This makes getting around on public transport a relatively easy affair, though you’ll no doubt receive some perplexed looks from fellow passengers. In contrast, windsurfing equipment, once broken down, still necessitates the need for a van or large car, making it almost impossible for anyone who doesn’t have these facilities.

Surfing comes in close behind in terms of size, and due to their fragile construction, always carry a risk when being flown anywhere. Renting on location is often a better option. With any good board bag, snowboarding is relatively easy to get on location, with many airlines offering a specific service. But what trumps the lot? A good old Penny skateboard!

Cost

The initial outlay for windsurfing gear is about a 3rd more expensive then kitesurfing gear, but as the sails are more sturdy then kites, over time they don’t need to by replaced as often as kitesurfing gear. As an alternative to new, both sports have well developed second hand markets, though it’s important to know exactly what you’re buying as some older gear can be dangerous. In terms of lessons, kitesurfing tends to require more, this partly due to the fact that there is more safety to be taught, and that the risks are greater to yourself and others if you don’t have lessons. With windsurfing you’ll likely be on the board and riding on your first lesson. All in there’s little to it between kitesurfing and windsurfing. For our lesson prices have a look here – https://www.thekitesurfcentre.com/prices

Surfing is cheaper, as once you have your wetsuit, you only need a board, which can cost anything from £50 to £500. Lessons are not required to get out and have some safe fun, though a good understanding and respect for the beach that you choose to surf at is. Snowboarding kit all in is comparable with surfing, though lessons are advised, and factor in the holiday cost: after flights, accommodation and lift pass, you can be looking at a tidy sum. I would say £500 all in for a week in the Alps will be the bare minimum; pain au chocolats not included.

Feel Of The Ride

Each of these sports differs significantly in how it feels, and what is most enjoyable to you is of course dependant on your preferences. Having experienced all 4 to some extent, for me nothing compares to the thrill of snowboarding. But as I live near the south coast of the UK, and not the Alps, kitesurfing is the best option for me. I would choose this over windsurfing as, largely due to kitesurfing’s jumping ability, the potential to develop tricks and techniques is almost boundless, whereas windsurfing is relatively limited to cruising, though this is also a great buzz. Surfing isn’t really an option due to the lack of decent conditions, though if I were really committed it wouldn’t be impossible, particularly with the advent of SUP boards, that are more adept at catching surf then their traditional counter parts.

So that’s my Kitesurfing/Snowboarding/Surfing/Windsurfing comparison and crossover. All of these sports are great fun, and are a great way to help you keep fit, happy and healthy. Hopefully this will provide you with an understanding of the main considerations. At the end of the day, there is no substitute for putting on a wetsuit, or pair of salopettes, and giving it a go yourself, so book some time off work, book a lesson, and get involved.

Here’s some more reading –

Rupert Cawte’s snowboarding speed record – https://www.datawax.com/waxes1/news-blog/rupert-cawte/

Difference Between Kitesurfing And Kiteboarding?

You may have heard these terms used in conversation and thought, what do they actually mean? Of course, one could easily mean the other; kitesurfing involves a kite and board, so could easily be referred to as kiteboarding, and kiteboarding could easily refer to riding along a beach on a beefed up skateboard being pulled by a kite. . .Waaaah, what’s the answer?! Well, it really depends on where the question is being asked. Let’s break it down.

The Difference

Here in the UK, kitesurfing is the sport of riding through the water with a kite and board, the logic being that surfing is a sport that takes place in the water. This is probably the definition that you are familiar with, and is the term that is used by the majority of kitesurfers and kite schools in the UK.

Many other countries, including the USA, South Africa and Australia, refer to kitesurfing as kiteboarding. So instead of referring to the act of surfing, they refer to the instrument on which it is done; the board. Why is this? Well a likely explanation is to look at the governing bodies of the sport.

BKSA

Internationally there are two principle organisations. The BKSA, short for the British Kitesports Association, is the governing body for the UK, and they are responsible for the maintenance and development of the sport. They train instructors, organise competitions and events, provide 3rd party insurance to riders, ensure safety standards in schools, and help to maintain beach access for kite flyers, along with many other things. Largely through their commitment to safety, an effective quality assessment method for both instructors and schools, and their accessible approach to training instructors, the BKSA have built a good reputation that is now being exported to other countries as a basis to train instructors and provide guidance to schools.

IKO

The IKO, short for the International Kiteboarding Organisation, is the American version, which has a much broader recognition internationally, and therefore promotes the term kiteboarding, for what we in the UK know as kitesurfing. The main difference between the BKSA and the IKO is that the BKSA is a registered non profit, whilst the IKO is not, and this is reflected in their practices. To summarise, IKO provide tuition for instructors and schools, much like the BKSA, but require minimal follow up to ensure that standards are maintained. For a more in-depth comparison – https://www.thekitesurfcentre.com/news/bksa-vs-iko

So kitesurfing in the UK refers to the act of whizzing through the water on a board with a kite. Abroad, this is mainly referred to as kiteboarding.

What does Kiteboarding refer to in the UK?

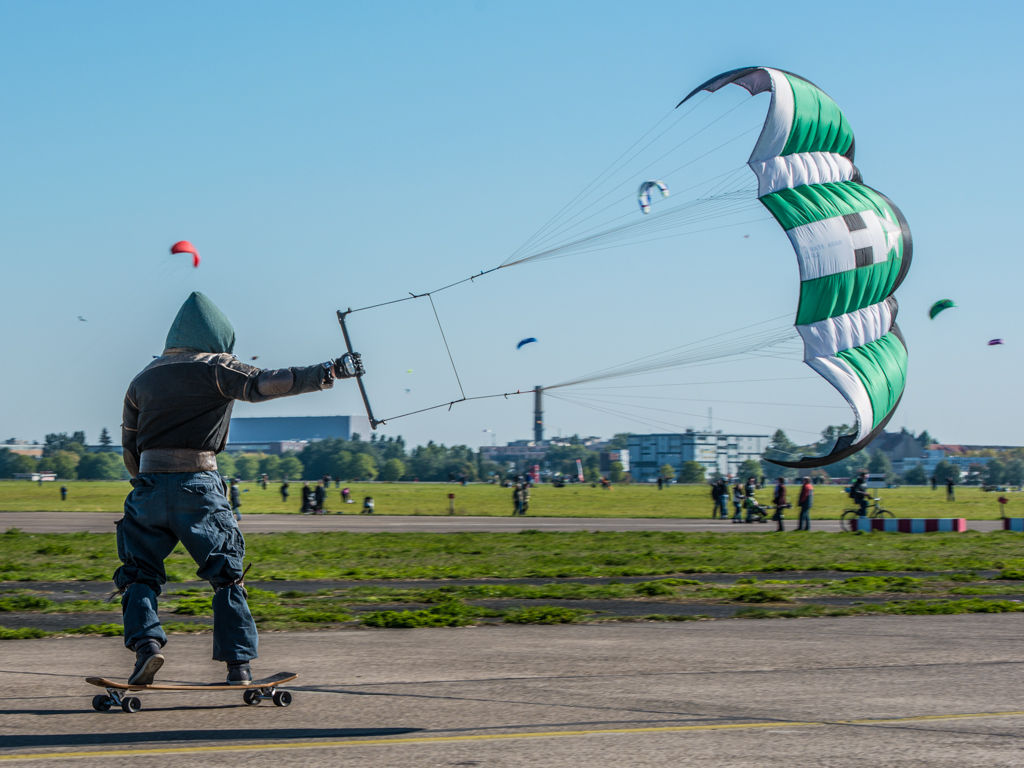
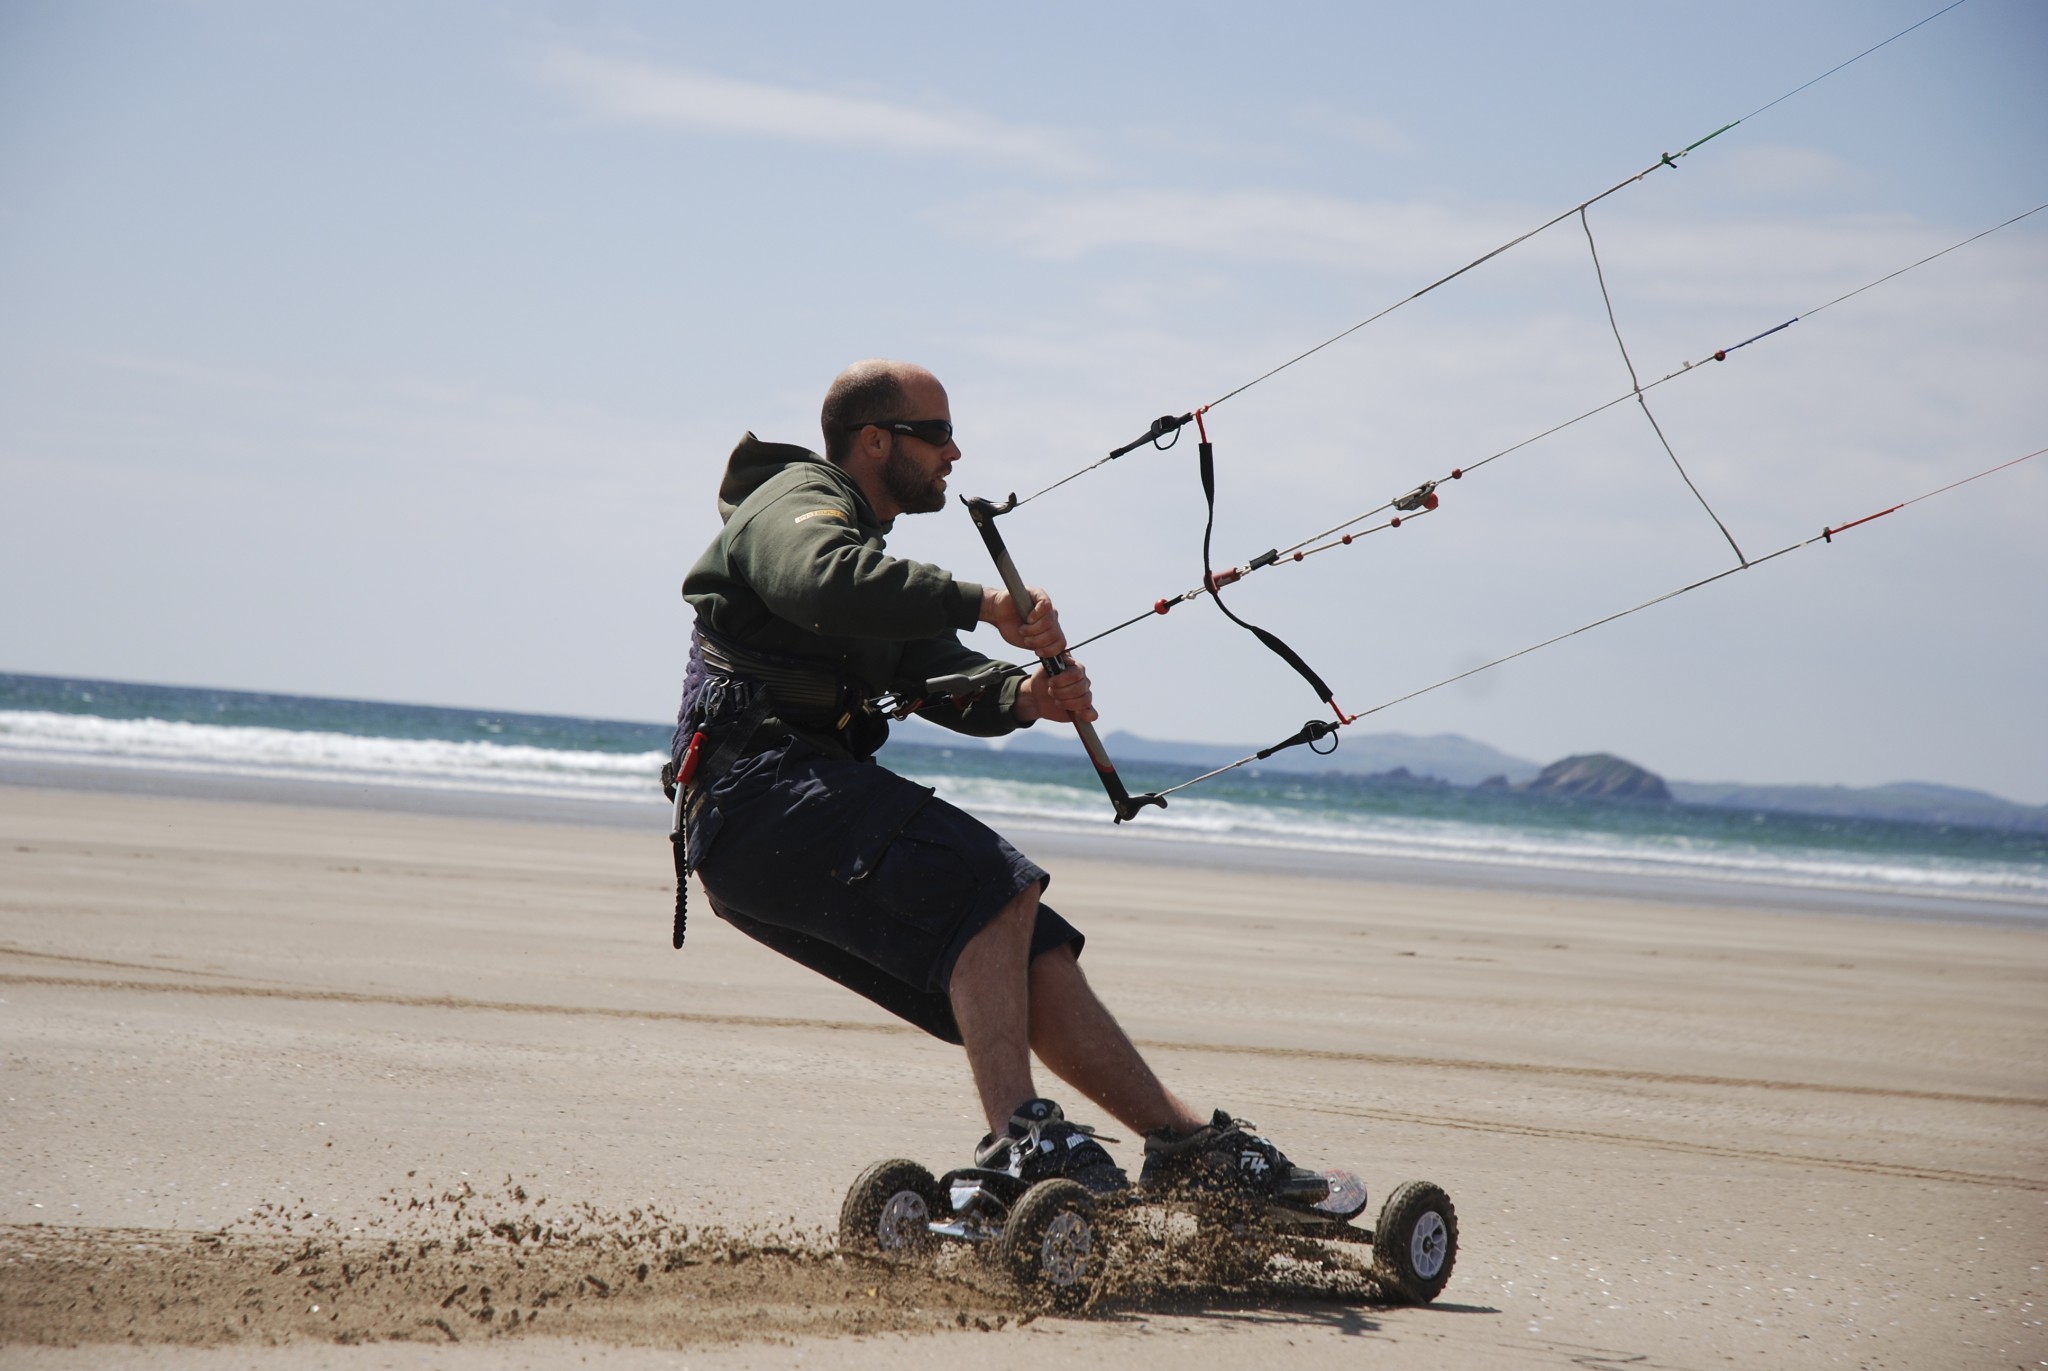
As previously mentioned, kiteboarding is the dry version of kitesurfing, and has been around for as long, or perhaps even longer, then kitesurfing. Instead of using a kitesurfing board, kiteboarders use a skateboard with large wheels, this providing them with plenty of ground clearance to whizz across the beach on. Sounds fun!

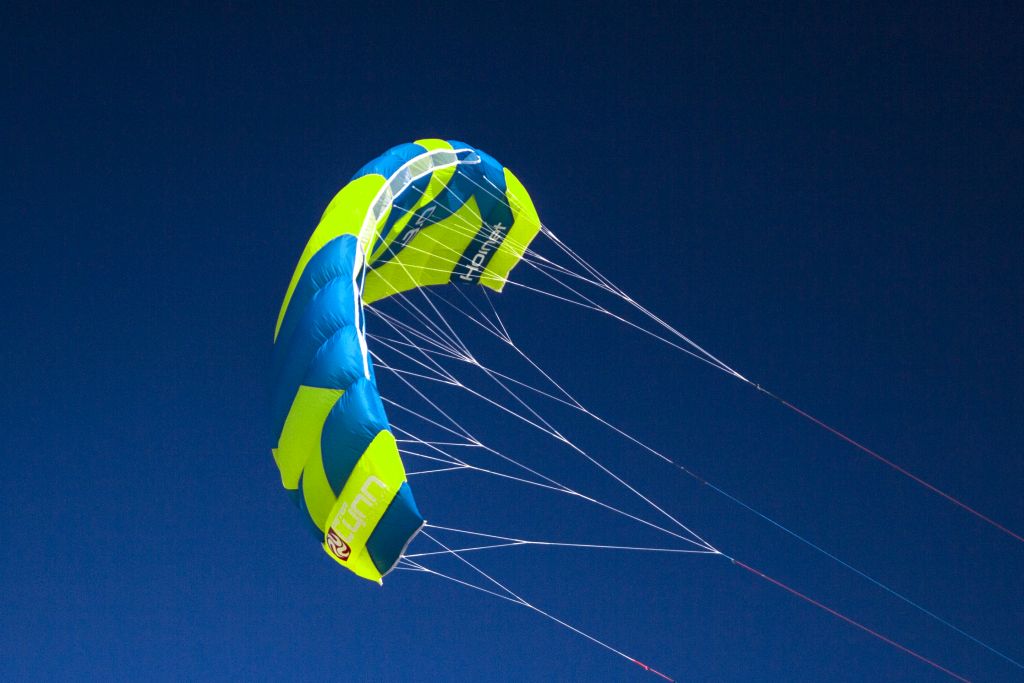
The other main difference in a kiteboarder’s makeup is the type of kite they use. Typically they use foil, or ram kites. As it is not easy for kiteboarders to redirect a downward pull, they require a kite that is effective at pulling them to either side. Foil kites are better at flying on the edge of the wind window as they are high aspect, and on account of their lighter weight, less likely to fall to the ground then the LEI kitesurfing kites. kiteboarders also do not require the use of an LEI as they are not playing around in the water. If they crash a foil on the beach, it’s not going to get mushed by the waves, and can therefore be easily relaunched.

Other considerations for kiteboarders centre around the beach. Long and deep sandy coastlines are ideal, giving plenty of room for all beach users and birds to enjoy the space. A decent run of sand needs to be exposed by the tide, and the density of sand is also significant. Kiteboarders prefer to ride on raised strips of sand, or sandbanks, as this is where the sand tends to be the hardest, providing the most ideal surface for riding.

If you’d like to give kiteboarding a go, have a look at our courses. It’s great fun, and teaches you many of the skills required for other kitesports should you wish to try something else. https://www.thekitesurfcentre.com/kitesurfing-school/kite-landboarding-lessons

So what is the difference between kitesurfing and kiteboarding? Rather oddly, your location!

How Fast Can Kitesurfers Go?

It’s a funny thing. Standing on the shoreline and looking out at any kitesurfer, you would be forgiven for thinking that riders seem to pootle along at no great pace. They are after all, usually a good distance away, with no still feature to relate their speed to, and they are usually tacking towards or away from you, meaning you don’t see them running the length of the beach. Don’t let this illusion fool you. Kitesurfing is fast! And can be very fast. So much so that almost since the sports inception, riders have been chasing down the coveted accolade of fastest sailor in the world, culminating in some interesting board design and kit combinations. Let’s take a closer look at the 2 main ingredients – the board and the kite.

Kitesurfing Boards – Choices For Speed

In pursuit of sheer speed, the limiting piece to a kitesurfer’s make up is usually the board, as this is what gives the most resistance. The standard board of choice for most riders is called a twin tip; a wonderfully versatile instrument that is great for anything from ‘mowing the lawn’, to doing a you have to be absolutely bonkers megaloop. Although with the right conditions a respectable pace can be reached with a twin tip, to truly join the speed club you need something a little more specialised.

An average rider on a twin tip would usually cruise at around 15 – 25mph but speeds of up to 35 – 40mph can be achieved in the right conditions. Take a look at the table towards the bottom of this post for the achievable speeds with different equipment.

The Race Board

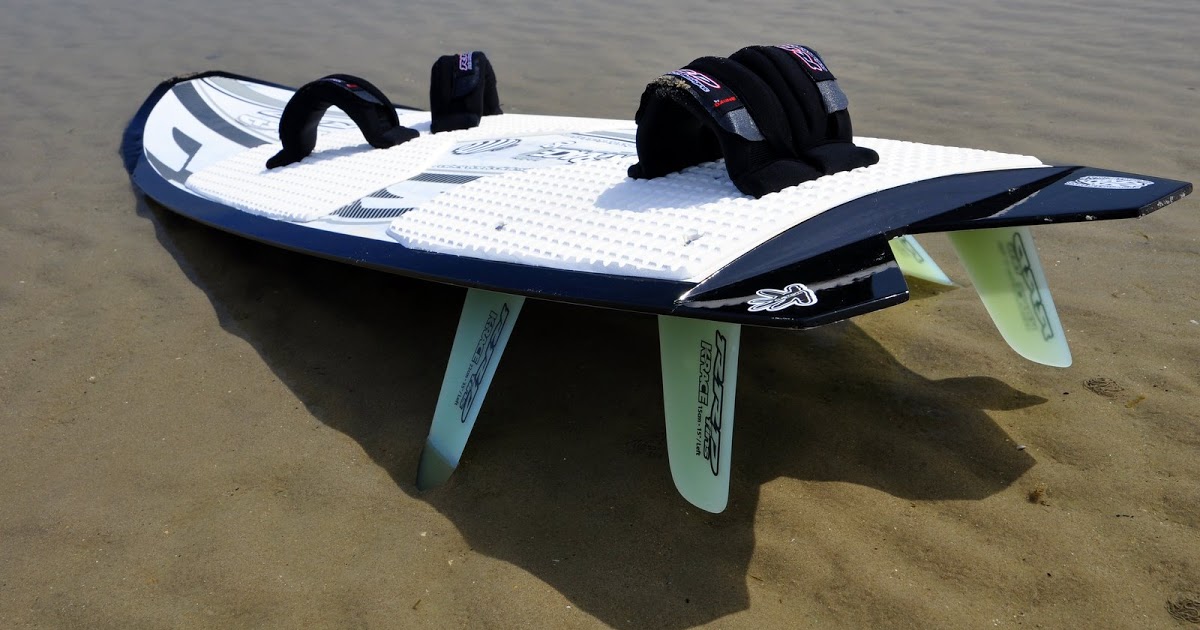
As the name suggest, this design of board was born out of competition. Resembling a large surf board that has been cut in half, with typically 3 to 4 large fins, this board works on the principle of lifting the board above the chop, and therefore drastically reducing the drag caused by the water surface. This lift is known as the ground affect. As the rider gains pace, a high air pressure is developed under the nose of the board, and as the speed builds, this pressure develops further back, eventually filling almost the entire space under board and lifting it above the surface. As there is very little board in the water, it is up to the large fins to stop the rider being pulled downwind by the kite. Cool!

The race board was a successful design, being built by many of the major manufacturers. However, about 5 years ago, it was swiftly swept aside by a new style that has seen its way into just about every water sport out there.

The Hydrofoil

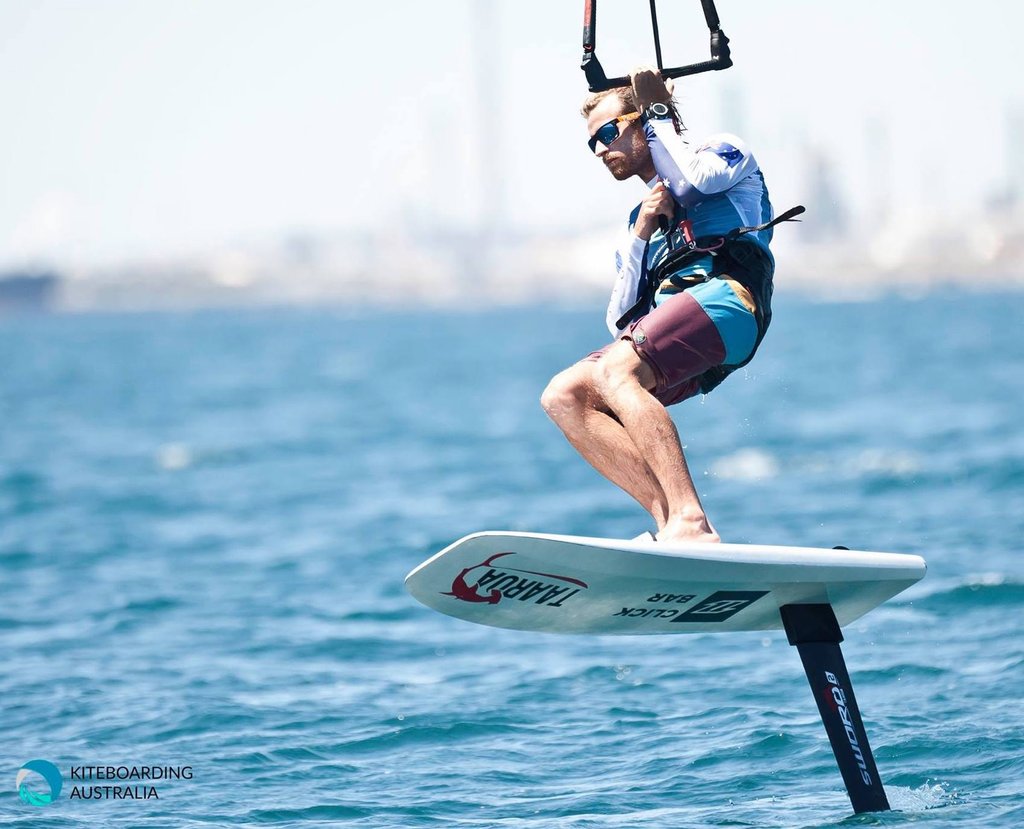
Very similar to the race board in terms of board shape and size, this one has an underwater wing that is attached to the board with a big fin. Working on the same principle of lift, the hyrdofoil creates this using water pressure, rather then air pressure. As the rider gains speed, and applies a little back foot weight, the underwater wing increases its angle of attack to the direction of travel, lifting the rider out of the water, much as a wing pulls a plane off a runway when the nose lifts up. The fin is a very effective surface that enables the most acute into wind tack of any board. These are finely tuned instruments with very little room for error, requiring an exact technique that takes a lot of dedication to develop. The hydrofoil is now the board of choice in racing. It’s very fast and spectacular to watch, but is by no means the fastest.

The Speed Board

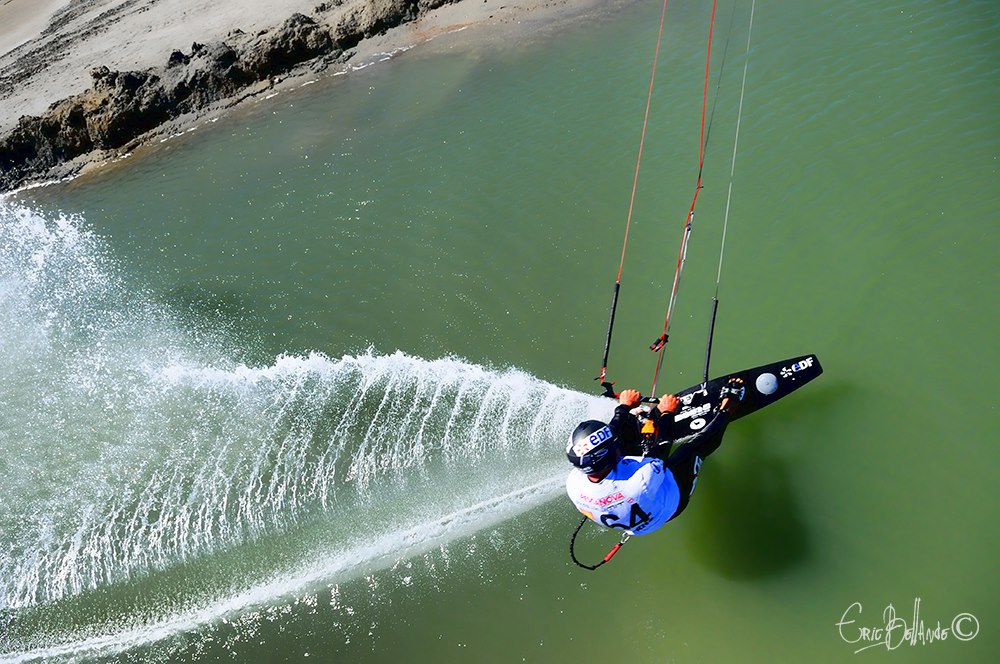
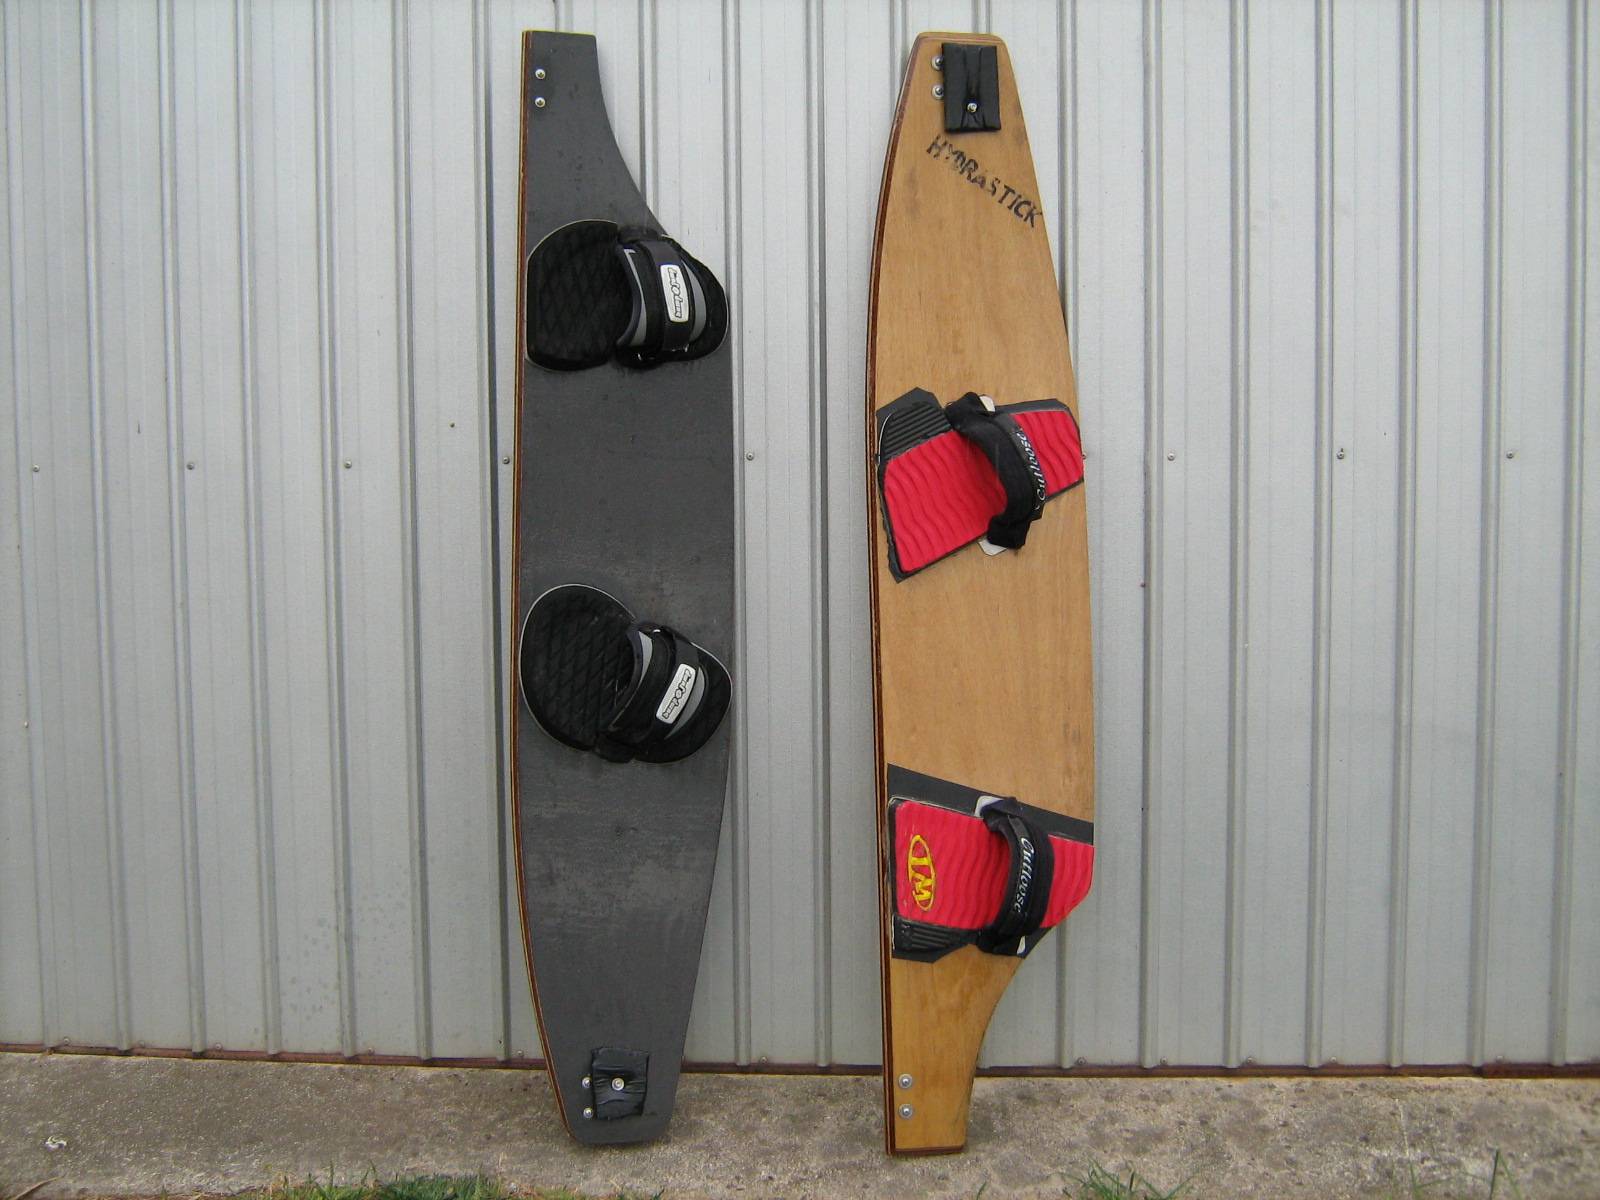
Designed for the sole purpose of flat out sheer speed, it looks more like a single ski than a board. These have been around for quite some time, and work on the same principle of the twin tip, though with far less displacement. Compared to the hydrofoil, these boards enable the rider to hold down much more power from the kite, and when this is applied to a slightly downwind direction, the speeds that can be reached are pretty nuts! The current record holder is Alex Caizergue, laying down an immense 57.97 knots (66.66mph). What a buzz! Windsurfing is close behind at a wacky 53.27 knots (61.26mph). You can imagine that at these speeds you want a flat as possible surface of water – not an easy combination when your looking for wind speeds of up to 50 knots.

How Fast Can Kitesurfers Go – Board Top Speeds

So how fast can kitesurfers go? We’ve compiled a table with the tops speeds recorded on specific boards with GPS.

Board TypeTop Speed (mph) in perfect conditions
Twin Tip38
Surfboard38
Hydrofoil45
Race Board55
Speed Board67

So where can you do this?

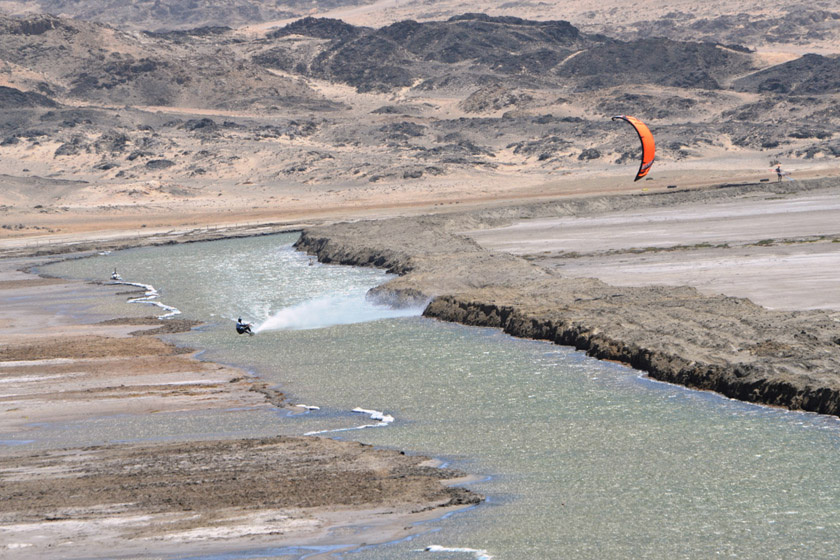
The annually held Luderitz speed challenge is the home of watersports speed records, where speed daemons try their fibre glass against the strongest winds. A long, thin channel is dug along the beach, which when filled up with sea water provides the perfect flat water surface to let rip. However, the record has recently been snatched from Luderitz by Mr Caitergue, returning the title to the home of kitesurfing, France.

What about the kite?

Over the development of kitesurfing, the main focal point for manufacturers to flex their ingenuity and competitive advantage has been, perhaps not surprisingly, the kite. As such, there are many different designs and classes of kite available, classes which have been naturally paired with a style of riding. Although multiple lengthy blogs could be written on kite design, I’ll do my best at a succinct break down!

First Off

A kite’s canopy profile is the most important feature when considering how a kite will perform. This is broadly defined by something called the aspect ratio, which describes a kite’s depth in relation to its width. A low aspect kite has a deep canopy that typical narrows towards the tips, and a high aspect is of course the opposite; these are kites that have a thinner canopy that runs more or less constant to the tips. LEI stands for Leading Edge Inflatable. These are the pump up kites used by most kitesurfers.

LEI Low Aspect

These fly comparatively slower through the wind window due to increased drag from their shape. As such, they are typically used in teaching, or for anyone who wishes to simply cruise along with a stable and easy to fly kite. They also have high wind ranges, meaning they can be used in a greater range of wind speed. Although very powerful, the deep canopy means they like to sit deep within in the wind window, which tends to pull the rider more downwind, rather then in a side wind direction. This means that more board displacement is required by the rider, increasing overall resistance; not great for higher speeds.

LEI High Aspect

High aspect kites on the other hand like to sit on the side of the wind window, pulling a rider along rather then downwind. This benefit is greatly furthered by a something known as apparent wind, which these kits are particularly effective at making use of. Not getting too technical, this is the phenomenon of when the angle of incoming wind to any sail is altered by it’s own momentum, resulting in an improved upwind ability that builds with the kite’s speed. High aspects also have a smaller front profile then lower aspects which decreases their wind resistance. A thinner leading edge does make them weaker in the high winds in which they are typically flown, so to compensate, they tend to have a 5th line that connects to the middle of the leading edge. Used by the pro freestylers, these factors combine to also make a good choice for any high speed pursuer.

The vast majority of kites flown are a half way house between these two designs, doing their best to utilise the advantages of both ends of the spectrum. These are known as hybrid kites, and typically marry performance, usability and versatility into a user friendly package.

Foils

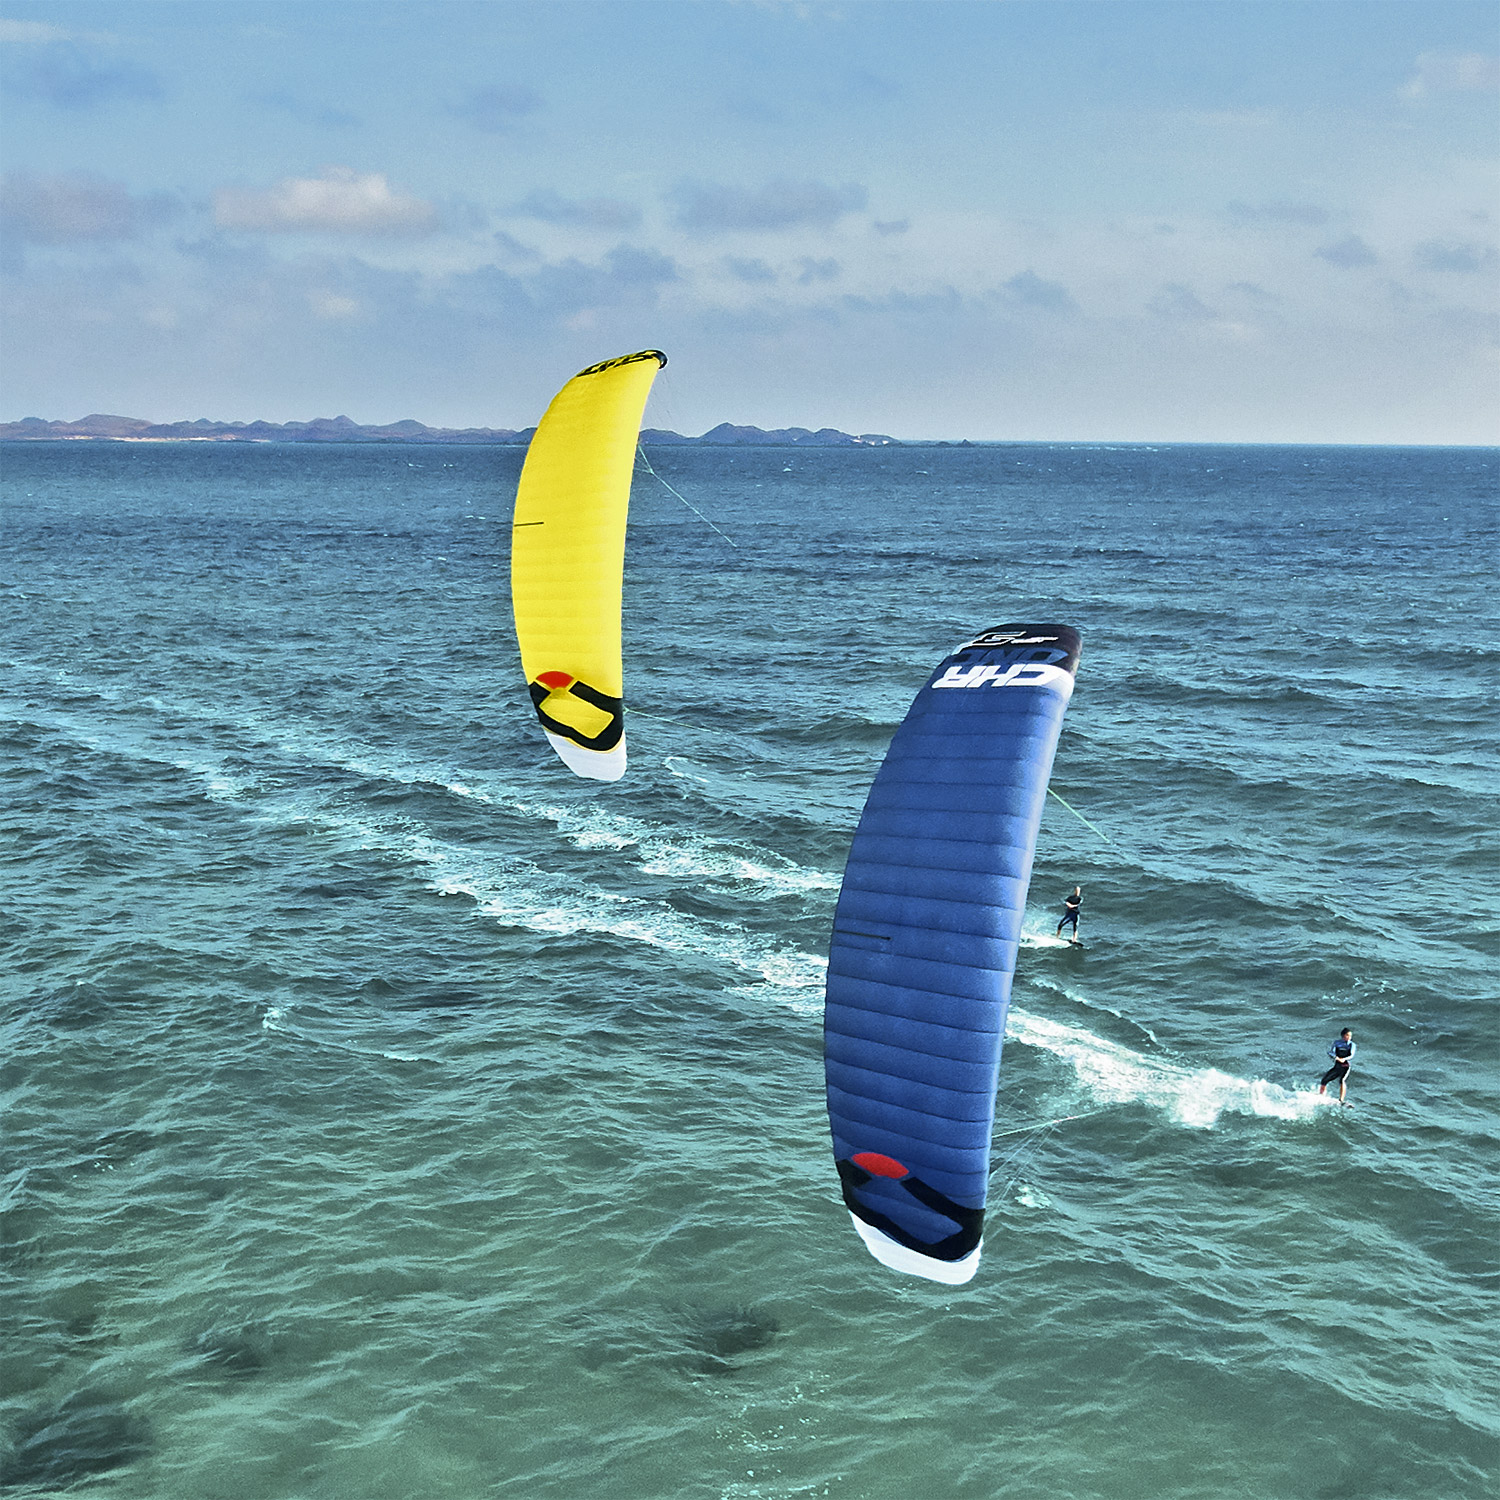
The last and by no means least of designs is the foil kite. As they are a variant of a paragliding sail, these have been around far longer then LEI kites, and although they have been used in land based kite sports, they have never been specifically developed for kitesurfing. The advent of the hydrofoil changed this. With the combination of an efficient board and light kite, Hydrofoiling has filled the light wind void that was previously unattainable, mainly due to the limitations of heavier LEI kites and less efficient boards. Foils perform superbly in light winds. They are constructed from much lighter fabric, and don’t require as much hardware as the LEI’s; parts such as bladders, valves and tubes. They tend to float through air, providing more lift to the rider. This is handy particularly when tacking on a foil board, as the more light footed you are, the easier it is. They are high aspect, lending great upwind performance and flying efficiency to the rider. They are however not a kite of choice for speed riders, simply because without the inflatable rib structure, they can’t handle high winds.

So as you can see, many different kites are available to satisfy the many variables of kitesurfing. What would be the choice for speed pursuit? A high aspect LEI, such as an F-one Bandit would hit the mark.

How About Technique?

Previous discussion will give you an idea of some of the considerations to take into account. High winds, flat water, and specific boards certainly help, but in truth any rider can give it go, with any combination of equipment.

A word of caution: according to your responsibilities as a kitesurfer, always make sure the coast is clear, especially when travelling at high speeds, and that you are well aware of any underwater hazards that may be in your way. The guys hitting the speed strips are fully trained and build up to it. Check out some of their crashes if you’re feeling a little overconfident!

Here at Camber Sand, mid tide provides some great flat water channels. Alternatively, if the wind is strong and the waves big, in between the swell provides the flattest of all water. An easy way to keep track of conditions and tides is through our live feed – https://www.thekitesurfcentre.com/weather

To get the most power from the kite, fly it not far off from the water surface. The real key to speed is your tack. Coming off your edge, bare slightly down wind. The kite will seek for more power by sitting deeper into the wind window, and you will feel your speed increase dramatically. And to stop? This is not as easy at high speeds as edging your board is more tricky and tends to skip along the surface. Throwing your weight back, push down hard on your back foot and edge hard into wind while easing out the bar. You’ll notice the kite will ping forward, and the power will reduce giving you more control to bring it up to 12 o’clock, and your speed will decrease. Best to build up to this with good practice.

How fast can kitesurfers go? Very, very fast! Speed and kitesurfing are well acquainted. Check out these clips for some inspiration, and give it a go yourself. Just remember, be safe.

How Easy Is It To Learn Kitesurfing?

For anyone who wishes to get into kitesurfing, this will naturally be one of the first considerations. It will after all govern how much time, money and commitment will be required to experience the thrill of whizzing across the surface of the sea. I remember the first time I saw a kitesurfer; zooming along the coastline of Aberdeen. Despite the natural associations of playing around in the North Sea, I was immediately hooked with the idea of getting into kitesurfing, and committing myself entirely to whatever it would take to be that person. But it looked like an extreme sport, and according to my preconceptions, would therefore be hard to learn. 7 years on, 5 of which I’ve spent instructing at The Kitesurf Centre, I feel qualified to answer this question!

How easy is it to learn kitesurfing? Let’s break it down into the main points:

Prior Experience

Kitesurfing is 90% kite, 10% board. Although students with previous board experience, such as snowboarders or skateboarders, are advantaged, this is only marginal. Those with sailing experience tend to have a greater appreciation of the wind and it effects. No worries! This is theory that we teach from the beginning, and is simple enough to understand. Flying a kitesurfing kite, also known as an LEI, is a new experience for every student, so when we teach a group lesson, all students start from pretty much the same point. Teaching the theory of how a kite flies, developing the correct technique to fly a kite, and scaling that technique to the larger kites is a process that all students learn from, and ensures a good flying technique that will be the basis of development.

Gender

When kitesurfing was first getting going in the 90’s, it was very much a male dominated sport, this largely due to the makeup of the windsurfing fraternity, from which many kitesurfers originated. This has changed enormously since, with just as many women learning how to kitesurf as men. There’s loads of independent female riders at Camber Sands, and if you need further convincing, just have a look at the pro scene. At The Kitesurf Centre we have a good balance of male and female instructors, and the choice for ladies specific equipment grows every year, with specific harnesses, wetsuits and boards on offer. Check out our shop – https://www.thekitesurfcentre.com/kitesurf-harnesses

Age

I’ve taught students as young as 13, and as old as 73. One of the great things about this sport is that it doesn’t require a lot of strength or stamina, despite what it may seem. The usual assumption is that you hold onto the kite with your arms; after all it does look like this from a distance. The kite is actually hooked into a harness, and all you have to do is steer the kite, which is pretty easy peasy. I would say a minimum age is more relevant then a maximum age. A certain level of strength and size is required; too young and a student will struggle to reach the bar, or steer a larger kite.

Money

One thing that is fundamental is that you do have to have lessons. This is not a sport where you can simply buy a kite off Ebay, and have a go at learning yourself. There are a few variables that will effect the cost of learning. Some students are naturally faster at learning then others, and there are different ways of learning. I would say an average spend on lessons would be 500-800 pounds. This includes a 3 day course, and some private lessons to refine technique. In terms of equipment there are different ways of doing this. You can buy new, you can hire, you can buy second hand, or perhaps even borrow from a good friend! There is an extensive second hand market, though make sure you research what you’re buying before purchase. Finally, once you’re kitted out, the wind is free!

Safety

I recently wrote a blog about this. Improvements in kite design, well regulated schools, and highly trained instructors have a made a sport that is safe and fun to learn. More information here – https://www.thekitesurfcentre.com/news/is-kitesurfing-dangerous

To Conclude …

So there’s a little discussion about the main considerations in answering the question How easy is it to learn kitesurfing? One of the best pieces of advice I could give is, post first lesson, buy yourself a little trainer kite and practice in your garden or park. These are great for establishing a solid kite technique.

All in, if you are committed, kitesurfing is not a difficult sport to learn – how else would there be 1.5 million kitesurfers worldwide?!

Is Kitesurfing Dangerous?

This is a question that has often been asked when talking about kitesurfing with friends and family; it is after all a pretty extreme looking sport! There are various stories that circulate in the media and online about kitesurfing accidents. Being a safe kitesurfer is about taking the correct learning steps, and it is reassuring to know that the sport has come a long way since the early days of cowboys and pirates. Improvements in equipment design, UK schools that are well regulated by the British Kitesports Association, and a pool of hand picked, highly professional instructors, has led to a sport that is both easily accessible and safe to learn.

Of course, like with any sport, there are risks. However, these risks are avoided by good kitesurfing practice. Let’s take a look at the fundamental pre-requisites for safe kitesurfing.

  • There is the sea. To be a confident and capable swimmer is a must when kitesurfing.
  • Consideration. You will not be the only one on the beach and sea. Think of others.
  • Patience, patience and patience. From arriving from the beach to leaving, kitesurfing is a step by step by process. Carrying out this process with patience is fundamental, so give yourself plenty of time for your session.

So, you have these. What’s next? Through my 5 years of experience as a kitesurfing instructor, I know the difference between a safe kitesurfer and a not so safe kitesurfer. Simply put, it is those that have had lessons, and those that have not. Learning to kitesurf is like driving a car; without lessons driving is dangerous. With lessons, driving is safe. Kitesurfing is no different, and I would recommend at least a 3 day course as a good introduction.

Here is a break down of the lessons we offer – https://www.thekitesurfcentre.com/kitesurfing-lessons

Why is this?

Well, firstly, the combination of sea and wind throw up their fair share of potential hazards. On your first lesson we teach you about how to keep safe in this environment by following some simple rules. Aspects such as what is a safe depth to practice in, which kite size to use for what wind speed, and the role of tides will give you a comprehensive understanding of a safe kitesurfing environment.

Secondly, how to fly the kite, and how to use your safety system if something goes wrong. This involves teaching you some theory as to why a kite flies, developing your flying technique on small kites, and introducing you to the larger LEI kites in the sea, and the fun of bodysurfing!

As I mentioned earlier, equipment has come a long way in design. If something goes wrong, there is a very simple and wonderfully effective process to disable the kite. Great stuff!

More about day 1 here – https://www.thekitesurfcentre.com/news/kitesurfing-a-beginners-blog-part-1

Once you’ve had your 3 day course, what’s next?

Your safety is our absolute priority, so we suggest continuing your journey on further group lessons, or private lessons, until you and your instructor are confident for you to continue developing by yourself.

Of course, you are never alone. Being a kitesurfer is about being part of a community who share the thrills of what is an amazing sport. Once your lessons are complete, it is this community that is the greatest source of knowledge to ensure your safety. From how to setup your kite, to what the forecast is, if you are unsure about anything, always ask – don’t guess. We at The Kitesurf Centre are always around to help you out, so give us a shout.

So is kitesurfing dangerous?

Simply put, without lessons, yes. With lessons, no.

Get those lessons booked and get involved!

How Long Does It Take To Learn To Kitesurf

How Long Does It Take To Learn To Kitesurf?

How long is a piece of string? Learning to kitesurfing comes easily to some whereas others it’s more difficult. There are several factors which must be considered before it can be determined how long it takes to learn to kitesurf. The good news is that ANYONE can learn to kitesurf, we’ve taught a whole mix of people in the past, right up to 83 years old!

There has been students who are riding after 4 hours of tuition and jumping after 10 but below we’ve put a more realistic time frame together for the average Joe (or Jane!)

  • Age
  • Experience with powerkites
  • Determination
  • Experience with other similar sports (wakeboarding, snowboarding, skateboarding, etc)
  • Prior knowledge & understanding of wind direction & speeds
  • Ability to listen & take on feedback from an instructor
  • Fear
  • General co – ordination

The main advantage to reducing the time it takes to learn to kitesurfing, is having some sort of prior experience with other similar board sports. Wakeboarding is he best, as the board control is almost identical but snowboarding and skateboarding also help. Once you’ve learnt to fly the kite, getting on a board is more natural because you’ll have the muscle memory from the other sports. Getting hold of a skateboard for a quick ride will make a difference to your progression and it’s a cheap & easy way to improve your progression.

It’s no secret that as you get older, the more difficult it is to learn new sports, and kitesurfing is no different on the practical element, however, age can be your ally when it comes to understanding the theoretical and safety side of things which in turn aids with overall progression.

It’s occasionally an advantage for the younger generation to have a lack of self preservation and a ‘just go for it’ attitude. It sometimes helps break down barriers and aids progression.

Unfortunately as you get older self preservation moves up the ‘list of important things’ and even if you’re not in a dangerous situation (such as during a kitesurfing lesson), your brain doesn’t allow you to throw yourself into an unknown situation as easily. This isn’t always a bad thing though! People learn in different ways and sometimes ‘gung ho’ doesn’t help everyone’s progression

The good news is that most of the list above can be improved from reading our blogs & getting a skateboard & powerkite before your first kitesurfing lesson. The rest can be left down to our very capable instructors!

How long does it take to learn to kitesurf in hours

  • 0 – 10 hours – The Basics – Safety, theory, equipment set up, kite flying, body dragging & an introduction to the board & first rides. All covered in a 2 day course.
  • 11 – 25 hours – Improvers – This is where prior experience starts to tell, some people will now get up and ride easily where others will need more perseverance. The aim at 25 hours would be to be able to at least practice independently, even for those with no prior experience and those a little faster at learning should be riding in control over medium distances.
  • 26 – 50 hours – Riding! Progression really accelerates with riding in both directions, linking turns together, keeping upwind & looking good.
  • 50 – 100 hours – Introducing first tricks, jumps, toeside carves, & rotations.
  • This is a conservative estimate and some people vary with progression.

Is Kitesurfing Easy To Learn?

When comparing kitesurfing to other watersports, most would agree that it’s one of the more difficult to learn the very basics and does require some more patience than kayaking, windsurfing or stand up paddleboarding (which can be riding / moving along within 30 minutes) in the first 5 – 10 hours.

But, learning to kitesurf has an unusual & very rewarding progression curve. The hours from 10 – 20 can sometimes be frustrating and progression can slow, as 0 – 10 hours is all go full progression, and then it clicks and WHAM you’re up, riding and screaming along. You’re on the board more than you’re not and your progression goes through the roof. This is where kitesurfing leap frogs most other sports, because now you’re looking to turn, carve a wave and your first jumps. How long does that take when learning to windsurf for example, 3-5 years?! The great thing about learning to kitesurf is that it’s exhilarating at every stage of the way and completely addictive.

Do I need to Take Lessons?

Gift Ideas for Kitesurfers

gift ideas for kitesurfers

Gift ideas for kitesurfers for Christmas & birthday are hard to buy if you don’t know much about kitesurfing, and there are so many baffling choices available.

Below we take a look at the 10 best gifts for kitesurfers to help guide you towards making the right choice within your budget. All the ideas listed below are under £50 but check out our GIFT IDEAS PAGE for more options.

10 Best Gifts Ideas For Kitesurfers – Christmas or Birthdays presents

1. Kitesurfing Gift Vouchers

It’s worth remembering that some kitesurfers have a lot of equipment already, which makes it’s hard to know what else they may need. Purchasing a gift voucher for a monetary value is sometimes the easiest choice. This also takes away the issues with getting something in the wrong size or colour. We appreciate it’s not considered as ‘personal’, but most people actually prefer this and it’s accepted that you’ve thought about their favourite hobby when making the purchase, rather than getting some tat from John Lewis!

gift ideas for kitesurfers

2. Solo Launch Strap

gift ideas for kitesurfers

The Solo Strap is a kitesurfer’s best friend if they find they’re on their own when they need to launch of land their kite.

The Solo Strap is a safe way to attach the kite to a fixed point so it can be launched and landed unaided. It’s nice and small so can be tucked into a kite bag when not in use.

3. Mystic Waterproof Carry All Bag

The Mystic Norris Carry All Bag is an essential part of any water man or water womans kit and it doesn’t cost the world. Large, durable & waterproof, it’s ideal to chuck in wet wetsuits, harnesses, bar & lines and the rest. They’re also very useful in day to day life and far more sustainable than an Ikea bag. It’s a really good Christmas or Birthday present for kitesurfers or anyone else, as everyone has a use for one.

gift ideas for kitesurfers

4. Secure KeyPod for car / van keys

gift ideas for kitesurfers

The Northcore KeyPods are a really useful piece of kit. They allow the user to securely lock their vehicle keys inside the lockbox and then lock the box to their vehicle. This allows piece of mind while out on the water, rather than the conventional way which is to leave the key on the rear wheel (no one will ever guess it is there!) These are a far better solution than using a ‘dry bag’ when on the water, as they aren’t always dry and modern electronic keys don’t like sea water. It’s a tool which can be used in other sports or scenarios where taking the key with you isn’t the best option.

5. Mystic Towel Changing Poncho

Everybody needs a changing poncho in their life. These are not just fantastic for getting changed in and out of a wetsuit without flashing the general public, they are also great for keeping warm and drying off after having a shower or bath at home. They come in various colours and patterns, as well as kids sizes. It’s a really nice gift even if it’s not for a kitesurfer!

gift ideas for kitesurfers

6. Tricktionary – the ‘How to’ book for kitesurfing

gift ideas for kitesurfers

This books starts from the very beginning and covers every step of the way on the progressive kitesurf journey, right up to World Tour professional tricks. It’s breaks each part down very simply and is in a really high quality print. Written by pro riders for those aspiring to be one (perhaps). It really is a great quality book and makes the perfect present for any level of rider and something they’ll never stop learning from.

7. Northcore Changing Mat

These changing mats may seem like a gimmick but are actually really very useful. Not only are they much nicer than getting changed on a muddy, cold, wet car park surface, they also keep all your wet kit mud or sand free together in one waterproof bag, and allow you to brush off your feet before getting in the car. It’s win, win, win! A really novel gift that most people wouldn’t have seen before. Ideal for any water sport.

gift ideas for kitesurfers

8. Surfing Ear Plugs

gift ideas for kitesurfers

It’s relatively unknown that regular contact with cold water can cause Surfers Ear, which can be painful and disruptive. These water sports specific plugs are designed to prevent it by blocking water into the ear while allowing full hearing and balance. Get these for a friend before they unknowingly damage their ears while enjoying the elements. It will benefit you in the long run if they go partially deaf without them!

9. Waterproof Car / Van Seat Car

Buy this as a gift and you’ll be thanked forever by the car owner. They are not only ideal for keeping the car seats clean and dry, but are the ultimate piece of equipment in the middle of winter when it’s too cold or you can’t be bothered to get changed, so just drive home in a wet wetsuit! It makes a great gift for kitesurfers but also ideal for use where cars need protection from dirt, oil, grease or mucky children as well.

gift ideas for kitesurfers

10. Wingfoil Gift Voucher

It’s well documented that kitesurfers get very grumpy if they’re not able to get on the water due to lack of wind. So why not increase their chances of getting wet by introducing them to Wingfoiling. It is the latest watersport and a fantstic fun. Many of us here have taken it up and with the various stages of learning it can be participated by anyone. It’s a nice gift for someone who would like to be introduced to something different and brand new, or cross over and learn a new exiciting sport.

Gift Ideas for Kitesurfers – Ask Us For Advice

If you’re buying for someone else and have no idea what to purchase then please feel free to contact us. We’re more than happy to advise what we think is more suitable.

Take a look at out GIFT IDEAS PAGE HERE

Kitesurfing Equipment Maintenance

Let’s face it, kitesurfing is an expensive hobby, so you want to make sure your kit lasts as long as possible. Although it may seem like a chore at the time, the best way to ensure your kit lasts as long as possible is to maintain and store it properly. We’ve gathered some top tips for kit maintenance from our instructors, to help you get the most out of your equipment. And for those occasions where something goes slightly wrong, we’ve also included some tips on making small repairs. Should you need something more major, we offer an equipment repair service.

KITE

Before

  • When setting up your kite, try to avoid DRAGGING IT OVER ROCKS as these will scuff the material
  • INSPECT your LINES and CANOPY (especially near the leading edge) before every session
  • Only SELF LAUNCH if you are a proficient kiter – getting this wrong can severely damage the kite (or you!)
  • If not flying the kite, carry it towards the water in a “U” or SMILEY FACE shape, with the struts facing upwards
  • CHECK YOUR BRIDLES before each session
  • Before pumping up your kite, CHECK THE BLADDERS ARE NOT TWISTED
  • DON’T PUSH THE PUMP TOO FAR INTO THE VALVE, and check there is NO SAND IN THE VALVE

Blog2

During

  • PICK THE RIGHT KITE SIZE – Going out too overpowered can make you more likely to damage the kite
  • Try to avoid crashing your kite, but if you can’t help it, RELEASE THE BAR and crash in DEEP WATER
  • If you decide to take anything more than a 10-minute break, PACK UP YOUR KITE. Leaving the kite FLAPPING IN THE WIND or LYING IN THE SUN will damage the kite
  • Spend the last 10 minutes of your session cruising along gently, this will give the kite time to DRY OUT

Image result for kitesurfing kite on beach

After

  • Only SELF LAND if you are proficient – slamming your kite into the beach or dragging it over rocks will tear through the canopy
  • Pack up your kite as soon as possible, especially in strong winds. A FLAPPY KITE IS AN UNHAPPY KITE.
  • If possible, PACK UP YOUR KITE AWAY FROM SAND, on something soft like GRASS
  • Lightly BRUSH OFF ANY SAND
  • If you’re kiting somewhere particularly HOT with very SALTY WATER (i.e. NOT THE UK) then wash your kite with fresh water after each session to avoid the SALT DAMAGING THE KITE
  • Pack your kite away FULLY DRY – if you cannot dry it straightaway, be sure to unpack it and dry it out as soon as possible. KITES LEFT WET WILL GET MOULDY.

Image result for kitesurfing kite drying

Storage

  • STORE YOUR KITE DRY, WITH NO SAND ON IT
  • DON’T STORE YOUR KITE SOMEWHERE HOT for long periods of time, as the glue on the seams gets damaged
  • Store your kite with the BLADDERS DEFLATED and VALVES OPEN so they do not stretch
  • If possible, store your kite in it’s KITE BAG, as this is the safest place for it

Repairs

  • If your kite requires a MAJOR REPAIR, or if the damage is NEAR THE LEADING EDGE take it to a kite shop to be professionally fixed
  • Small rips and scuffs (NO BIGGER THAN 1CM) can be fixed with a PATCH, which are often included with your kite. Make sure to ROUND OFF the corners of the patch and ALWAYS STICK THE PATCH ON THE INSIDE OF THE KITE
  • Before applying the patch, CLEAN THE AREA AROUND THE HOLE
  • Small PIN HOLES IN A BLADDER can also be fixed with a patch

Image result for kitesurfing kite repair

BAR & LINES

Before

  • UNWRAP YOUR LINES CAREFULLY, taking special care to AVOID GETTING SAND IN THE LARKS HEAD KNOTS as this will wear away at the rope material
  • If you set up on the sand, DUNK YOUR BAR IN THE SEA to get rid of the sand

After

  • FOLD YOUR LINES NEATLY around the bar; this will not only make it quicker to set up on your next session, but also increase their life
  • After every session, WASH YOUR BAR AND LINES WITH FRESH WATER
  • WASH METAL PARTS WITH FRESH WATER as these are the points that get damaged most by salt

Storage

  • Store your bar and lines NEATLY; IN A COOL, DRY PLACE

Image result for kitesurfing bar and lines tidy

BOARD

Before

  • Every 10 – 15 sessions, CHECK THE SCREWS ON THE HANDLE AND FINS
  • If your screws regularly come loose, TRY USING MEDIUM STRENGTH LOCKTITE

After

  • After each session, BRUSH THE SAND OFF YOUR BOARD
  • WASH EXCESS SALT OFF YOUR FOOTSTRAPS

Storage

  • Store your board in a COOL, DRY PLACE

Image result for kiteboards

HARNESS

After

  • When taking off your harness, LOOSEN THE STRAPS SO THEY DON’T STAY IN THE SAME PLACE, as this reduces them wearing in one point
  • WASH your harness and leash in FRESH WATER after every session
  • Check thoroughly and REMOVE ANY SAND OR SALT FROM YOUR SAFETY RELEASE

Storage

  • Store your harness in a COOL, DRY PLACE

KITESURFING LESSONS – PRIVATE TUITION (LESSON 4)

Kitesurfing. Guys. I did it.

Yep, guess who is now able to get up and ride 10 – 15 metres to her right (only 2 metres to her left, but sssshhh) and THE BEST TIME EVER doing it?! You guessed it, me! And for all you wonderful people out there who have been following my journey, and for those who have had a laugh watching my many failed attempts, our lovely instructor Paul filmed it for us!

After feeling like I’d made really good progress when I went out with Rupert I wanted to make sure I didn’t leave it too long before my next attempt so as not to forget everything I’d learned. As luck would have it just a couple of weeks later we struck gold, a lovely sunny day with plenty of wind and nice small waves. More wind meant not having to pump up a 17 metre kite, yay! After a site assessment and setting up the kite we headed down the beach and I chatted to Paul a bit about what I’d achieved so far. The great thing about having private lessons is that you can go entirely at your own pace and work on whatever you’d like, rather than following a set lesson plan. I mentioned I sometimes struggled with rolling up towards the kite when doing my board starts, so Paul suggested we try working on that on the beach, with him gently tugging on my leash to give me the feel of the kite. After a few attempts I was a lot closer to standing up so we headed out into the water, which was a lot warmer than I thought it would be!

Because of the lack of wind when I’d gone out with Rupert, he had held the board to help me get into it so that I was ready to go as soon as there was enough wind. Since we had enough wind this time, Paul said he wouldn’t being do that, and I’d have to learn how to put the board on myself whilst holding the kite! This genuinely terrified me. How was I supposed to float in the water and put the board on without diving the kite and getting dragged away?! In fact, it’s actually not that bad. I’ll admit I definitely struggled the first few times but after a while you learn to “feel” what the kite is doing without looking at it so you can focus solely on getting the board on. By the end of the lesson I had no issues in getting the board on pretty quickly each time, something I was actually quite proud of!

The “rolling up” to standing position was definitely the part I struggled with the most. Whilst I’d heard many horror stories about students “superman’ing” over the front of the board (shout out to my friend Shannon who managed to release the safety AND lose a contact lens in the process!) I seemed to be going the other way, being too timid with standing up and ending up sitting back down in the water. The best tip Paul gave me was to try and get my head to my knee. For someone as unflexible (is that even a word?) as me that sounded ridiculous, but aiming for that did sort of force me to try harder with the motion of getting up.

The great thing about Paul as instructor is how genuinely patient and encouraging he is. Every time I tried to get up on the board, he was right there with me to give me little tips and pointers, and didn’t get frustrated with me at all. As the guys who own the centre will tell you, I am a perpetual worrier. It’s difficult not to worry that your instructor is bored (and freezing!) whilst it takes you what seems like 5387 attempts to get up on the board. I have to give it to every instructor I’ve had so far – you can tell they love their job and don’t mind at all if you don’t get things right all the time. Massive thanks to Paul, Rupert, Jen and Samina for putting the time in with me! If you’re nervous about trying kitesurfing because you think you’ll struggle, I’d honestly say just go for it!

The most difficult thing I found when first attempting the board starts is how much you have to think about, so it was useful to focus on a small part of it each time I tried, until eventually I could put it all together. Because I’d spent some time flying powerkites in between my lessons and had also had a kitebuggy lesson at the centre last year, I found the kite control part of the board start manoeuvre quite easy. If you’re struggling with controlling the kite or feel quite nervous with it, I’d definitely recommend having a play on something like a Peter Lynn Impulse Trainer – they’re super easy to launch even on your own and I’m much more confident with kites thanks to them.

After a good few attempts and correcting different things I was getting wrong, I was getting up more consistently, and in the 90 minutes we spent out in the water I noticed a definite improvement. Not only was I able to get up most times, I was riding further each time and wasn’t so hesitant about diving the kite. Most of the time I was trying to go right – this felt more natural as it’s the same way I snowboard, but Paul also helped me try to go left a couple of times. I was nowhere near as confident that way, but it was good to see that it didn’t go as terribly as I had thought (my left side can be pretty useless at times!)

I came back in with a huge grin on my face, happy that I was even closer to kitesurfing independently. I can’t believe that in just 4 sessions I’ve gone from learning how to fly a power kite to getting up and riding along without looking like I’m completely out of control!

Now it’s getting to winter and we’re a little less busy I’m hoping to get out another few times, but I’ll be wearing a jacket, booties and gloves for sure – kitesurfing in just my 4/3 is a little brave for December! Luckily we have a stash of super warm stuff for students throughout winter so I’ll be raiding that!

BEGINNER KITESURFING LESSONS GUIDE – DAY 3


Hey guys!

I’m back again and I’ve been back in the water! (I can’t wait to say I’ve been “on” the water rather than “in,” but I’m still spending a fair amount of time in it at the moment!) For my Day 3 lesson I had private tuition with Rupert, one of the three brothers who own and run The Kitesurf Centre. Rupert has been kitesurfing for many years now and is an experienced instructor – you’ll often see him out in high winds attempting to jump really high! Whilst I’m not planning on jumping any time soon I was hoping he would be able to offer some good advice and tips.

When it came to the day we’d planned to go out the wind was much lighter than expected, but Rupert explained that if I took a big enough kite I’d still be able to get up and riding. In fact, he said that it would be great for me to go out in light wind – having only ridden before in strong wind the light wind meant I would have the chance to perfect my kite-flying technique, not to mention the waves would be smaller! As a 5’2″ woman I can tell you that made me very happy!

Now, when he said big kite, I hadn’t quite expected 17 metres big! The fears I had had on my first lesson of being dragged along the beach by the kite came rushing back to me. How could I, a 60kg woman not get dragged along by a kite that big?! I asked Rupert if, before we headed into the water, I could have a go at flying the kite on the beach to see how it felt. Once again I was pleasantly surprised, I was still able to fly the kite without feeling like it was pulling me too much. It took me a while to get used to how much slower the kite flew through the air and how much more I had to move the bar with this compared to the 5m. Instead of just moving the bar slightly I had to get the bar almost parallel to the lines with my knuckles touching them! Rupert explained that the kite being slower meant that I would have more time to think and react when attempting my board starts.

Once we were out on the water I was amazed by how much smaller the waves were and felt pretty confident. It was brilliantly sunny and I was determined that this would be the day I would finally get up on the board. Since the wind was lighter, Rupert told me I would need to keep the kite moving as much as possible and do my very best not to crash it since relaunching would be difficult. He advised me to fly the kite in a figure of eight pattern before diving it for my board start manoeuvre. Before I knew it was I was going for my first attempt – I dived the kite, rolled up… and braced my legs, meaning I went ploughing through the water directly towards the kite. Oh dear, that wasn’t what I had in mind! I headed back towards Rupert and we chatted about how me being nervous had made me brace against the board, rather than straightening my right leg and bending my back one to kite off to the right. This time, he said, I was to “kick” my right leg out in front of me to get the motion and direction right. I tried again, dived the kite, extended my right leg… and forgot to roll up! I sank back down into the sitting position and sort of floated there for a bit, wondering how I was ever going to remember to combine all of the different parts of a board start. It all seemed so very complicated, but I was determined to keep at it. Luckily, Rupert has years of experience teaching complete beginners, so was super patient with me.

After a few more attempts, we realised my biggest problem was fear – I was scared to go over the front of the board, so I wasn’t rolling my body far enough forwards. I was scared to go too quickly, so I wasn’t diving the kite far enough. Often, I would go to dive the kite and then decide something wasn’t quite right – maybe the wind had lulled, maybe a wave had just hit me – so I’d panic and take the kite back to 12. Rupert decided it was because I was overthinking it and worrying too much, so we tried something different on the next attempt. He was going to tell me to go, and I had to do it. No worrying about the wind or whether or not everything was perfect, I had to go. “Go!” he said, and I dived the kite, extended my front leg… and WENT! I was up, on the board, heading off to my right. The feeling was incredible and a huge smile spread across my face. I was up! I could do this! Then it occurred to me I didn’t really know what to do when I was up, and as I slowed down I sank back into the water. Kite up in the air I practically ran (as well as you can through water) back to Rupert for a high five, grinning from ear to ear. I may not have got very far, but I’d got up, and I was unbelievably proud of myself.

“What do I do when I’m actually up?” I asked, eager to see how far I could ride. Rupert laughed and explained I needed to then go for the second power stroke, whereby I’d dive the kite again, to make sure I had enough speed to start planing across the water. After that I’d be able to keep the kite steady in the air and keep going. Still riding the high from my last effort I was keen to go again, so with my board back on my feet and Rupert shouting “Go!” I did it all again, this time managing to ride a little further but not quite getting the second dive strong enough. After a few more attempts I was able to go around 5 metres (this may not sound much, but I was more than happy with that!) before we decided to call it a day. I’d just had a great run and I’ve heard of too many kitesurfers injuring themselves after saying “just one more run” so it seemed like a good point to stop. By this point the wind had died off slightly and I was starting to get hungry – learning to kitesurf is a great excuse to eat more food!

As we headed back to the centre I couldn’t wait to tell the others how happy I was with my progress. Having worked in the school all summer, one of my favourite parts of the job has been seeing the smiles of students coming in from the lesson they’d first managed to get up and riding on. This time I got to swap roles and be that happy person already stoked for their next attempt. I couldn’t stop smiling for the rest of the day, happy that I was finally able to share the sense of pride and new found adventure I’d seen so many of our students have.

Next time guys, I’m going to get a decent run in. I’m aiming for 20 metres, and I’m going to get that second dive of the kite. I can do this! And you can do this too! If you’ve done your Day 1 and 2 with us, or had lessons elsewhere but aren’t quite managing to get up on the board then our Day 3 (Board Control) course is perfect for you! Drop us a call and book in – if you get a really happy sounding girl on the phone, it’s me! 🙂

BEGINNER KITESURFING LESSONS GUIDE – DAY 2

Hi there, you’re back!

Did you catch the kitesurfing bug on Day 1 just like I did?! It’s so much fun. I couldn’t wait to get back out into the water to perfect my body dragging techniques and maybe even try the all important board start! If you can, try to do your Day 2 course as soon as you can after Day 1 so it’s all still fresh in your memory, but don’t worry if you can’t – your instructor will give you some “homework” at the end of Day 1 with some useful pointers and reminders of what you covered. You can’t even go away and check out some tutorial videos on YouTube, there are some great walkthroughs and exercises geared for kitesurfers so you can progress even when you can’t make it to the beach.

A couple of weeks after my Day 1 Lesson, I headed back out for Day 2; this time with Jen, our resident northern instructor (everyone needs a friendly Northerner – they can teach all year round without being put off by the cold!). At the start of the lesson, Jen went through a quick recap of setting up the kite and flying it to check how much we had nremembered. I was worried I’d have forgotten everything but was pleasantly surprised by how much came back to me once I was flying the kite again. As the wind was quite strong, Jen put us on a smaller kite and gave us each a turn to show that we could still use it without getting dragged away, we just needed to remember that the smaller kite would be a bit quicker so our reactions would need to be too. After a couple of turns each we headed out into the water to progress with our body dragging.

On Day 2, you learn a new type of body dragging – the upwind body drag. This involves learning to fly the kite with one hand, straightening your body out parallel to the kite and tensing (almost like a seal in the mud with it’s head and tail raised!) in order to be pulled along. Upwind body drags are helpful for body dragging out to sea when you’re kiting somewhere with a shore break, getting back to the beach with cross shore and most importantly – getting back to your board when you’re out to sea!

After a couple of attempts where I didn’t make it all that far upwind, I managed to get the hang of it. Practising flying the powerkites with one hand was really useful here, it’s a scary thought at first but it’s actually not that bad! Despite having one wrist significantly weaker than the other following a bad snowboarding injury, I was able to fly the kite with each hand separately and make it upwind. If you’re worried you may not be fit enough to try kitesurfing, don’t be! Chances are you’ll be absolutely fine.

Once we’d all had a few turns at bodydragging the moment was here, we were going to try and get up on the board! We headed back to dry land to go through some theory and to practice the technique we’d use to stand up on the board. Since I have absolutely no core strength, I was pretty sure I wouldn’t be able to do it, and I certainly struggled for a while, but eventually I was able to roll up to stand with just a small tug from the instructor on my harness, which simulated the way in which the pull of the kite would help us get up. The trick here, Jen told us, was to not try and use the kite to pull us up too much.

Theory and beach practice done, it was time to go back into the water, only this time with the board. I watched the others have a couple of goes, getting to stand up once or twice, sometimes sinking back down pretty quickly, sometimes falling over the front of the board. It was great learning in a group here as we could laugh at each others experiences and reassure each other that even the crashes that looked bad weren’t actually that painful!

When it got to my turn, I pushed my feet into the board, sat back in the water, dived the kite… and STOOD UP! I got up the first time, and I couldn’t quite believe it. It became real pretty quickly when I sank back down into the water almost instantly, but I’d done it! Sure, I hadn’t quite got it right and on my next few attempts I had pointers each time of things to work on, but I was getting there. By the end of the lesson I may have only managed to ride a couple of metres, but it felt like a mile to me and I couldn’t stop smiling.

As we walked back up the centre to change, I was already excited for Day 3 and dreaming of eventually being able to call myself a kitesurfer.

BKSA vs IKO

BKSA vs IKO – Which is better?

When looking to take lessons or become a kitesurfing instructor, you may find yourself choosing between the BKSA or IKO. To give you all the account of each organisation and what they offer, we’ve drawn up a comparison below.


BKSA vs IKO – Governing Body or Private Company?

The BKSA (British Kite Sports Association) is the governing body (non profit) for all things kiting in Britain. They run all the training schemes, from grass roots to coaches. They are one of the most respected organisations world wide and set the bar in terms or quality and integrity. All BKSA schools have BKSA trained and qualified instructors who continually have to re-validate, update and pass assessments to keep their qualifications valid. The schools are inspected regularly by external examiners to check the equipment is in good condition and they are abiding by the strict guidelines set by the BKSA. It’s an official governing body for Sport England and therefore ticks all the relevant boxes in accordance with this.

One of the main aims for the BKSA other than training are the grass root schemes for kids and the racing events, which eventually may be used for the qualification for the Olympics.

The VDWS is the German counterpart and one of the other internationally recognised governing bodies.

The IKO (International Kiteboarding Association) is a privately owned company based in Cabarete, Dominican Republic. The IKO was set up as the sport began and became the leading organisation as the sport developed in the late 90s. As the sport became more mainstream, most developed countries created governing bodies to take the sport forwards and develop nationally. In terms of schools and instructors, the IKO differs to the BKSA, it follows a similar course and to become qualified but once qualified the instructors are left to their own devices. They have to keep a log of their students email addresses online (which they pay for) and a revalidation is an online quiz every couple of years. The schools pay an annual fee to become IKO approved but are never inspected as the organisation is in the Caribbean and it’s the schools choice whether to carry out risk assessments and follow standard operating procedures, all of which are strict procedures for any BKSA school.

Our verdict – Stick with the BKSA or a governing body for whichever country you’re in. The IKO is run as a profit making business with disregard for quality and safety. Kite schools and instructors can’t be assessed with an online tick box test every 3 years and often the kit is totally inadequate within the schools as they’ve never inspected and never will be. The IKO has been banned in several countries already and will likely be in more in the future. Don’t get us wrong, the BKSA has it’s flaws as well and can be improved in certain areas but the training side and structure of the governing body is spot on.

bksanew

BKSA vs IKO – For Potential Instructors

An example of the quality of IKO instructors is someone who came for a job interview with us and claimed he had never done a self rescue / deep water packdown. This is a method used to get yourself safely back to the beach if everything goes wrong when out on the water. It’s something any BKSA school would teach on the very first day of a kitesurfing lesson and all BKSA instructors are trained to both teach it but also how to rescue someone who has begun one, either on a boat or kite. To say we were shocked was an understatement!

The IKO has it’s place in under developed countries as a governing body isn’t available, so it’s better than nothing, but anywhere else it’s inadequate.

From a potential instructors point of view, the qualifications gained are also something to consider. We would suggest first deciding where you want to instruct. The BKSA qualification is recognised worldwide and we’ve never had an instructor declined a job because of their qualification. The IKO is recognised worldwide and as previously mentioned, in less developed countries it would be no problem picking up work. However, for a lot of countries it is becoming a banned qualification and may cause problems.

For information regarding instructor courses please click here

BEGINNER KITESURFING LESSONS GUIDE – DAY 1


So, you’re 26 years old and you’ve left the corporate city life behind you to move to the South coast of England and work at a Kitesurf Centre. Turns out the first thing you need to do is learn how to kitesurf…

Well, that might not be you, but it’s me. Hi! I’m Karen, and this is my story of learning to kitesurf.

I’ve recently moved to Camber to start work as a Bookings and Office Manager at The Kitesurf Centre, Camber Sands. If you’re already booked in with us you may well have spoken to me on the phone or over email. The guys running the centre have decided it would help me with chatting to you guys about kitesurfing if I actually know how to do it myself, so I’ll be taking lessons over the next couple of months and hopefully one day, perhaps next year, I’ll take my instructors qualification. I’ve been visiting the guys in Camber for the last 4 years, but never actually got round to learning… so, maybe just like you, I’m a complete beginner!

DAY 1 – “Even the words ‘body dragging’ sound scary”

It’s a warm, windy day here at Camber and there’s a space on a Day 1 of the Beginner’s Kitesurfing course with Samina. I’ll be learning with two guys; Bradley and Gedi. As luck would have it, I’d assigned the course to Samina, our Lithuanian instructor, and on the morning of the course, Gedi (a fellow Lithuanian) had called to check if there were spaces.

Samina is super enthusiastic about taking me for my first lesson, and though I’m a little nervous, I’m excited too! Once we’re all signed in and ready to go, Samina takes us up to the beach promenade to go through some basic theory and safety. She tells us all about the three key things to remember when picking a beach to go kitesurfing; the direction of the wind, the speed of the wind and the tide. Camber, on the coast of East Sussex, is a great place to learn and progress in kitesurfing. Because the centre uses both the beach at Camber and the beach at Greatstone (just a 10 minute drive away), the instructors can teach in any wind direction. She explains how when we’re first learning to kitesurf, we need just enough wind but not too much. Knowing there’s a maximum wind speed we will learn in (ideally, we’re looking for 10 – 25 mph) is reassuring; as a rather petite girl I’d like to know I’m not going to get blown away. Then we learn about the tides, and how it’s important to leave enough space either side of high tide to go kitesurfing, so we can safely launch and land our kites on the beach. Lastly, we talk about the hazards on the beach, in the air and under the sea. With all that done, we’re ready to go out and fly our first kite!

We head back to the centre, pick up a helmet and a kite and walk down the designated teaching area of the beach. To learn how to fly the kite, we’re using a Flexifoil Buzz kite, which Samina tells us is a great way to learn the basics of kite flying. Once down on the beach she shows us how to set the kite up in the correct position based on the wind direction and to check we aren’t setting it up near any hazards. She then talks us through the different parts of the kite and shows us how the lines and bar work. Once we’re all safely set up, we’re ready to fly! With a couple of small tugs on the bar my kite is up in the air and I’m actually doing it! I must admit I was pretty nervous about getting pulled down the beach by the kite, but just a few minutes in I realise I had nothing to worry about and I’m having loads of fun flying the kite in a figure of 8 and through different positions in the wind window Samina has taught us all about. Learning to fly the Buzz ensures I know all about the safety features and best way to use the kite and bar, something which we’ll continue with the whole way through our journey of learning to kitesurf. Learning this way is also seriously fun, so I can see why we have people who just hire the small training kites for a fun afternoon on the beach.

I really enjoy learning to the fly the trainer kite, and found myself proud when Samina tells me I’m getting on really well and that I’m ready to learn how to kite loop. Once we’ve all got our kite control to a good level we head back to the centre for a quick snack and to get changed into our wetsuits… we’re heading into the water to learn body dragging!

Stood at the centre in a wetsuit, harness and buoyancy aid (not to mention the bright yellow beginner’s helmet!), I’m beginning to feel like a real kitesurfer! Samina teaches us all about how to correctly put on our gear and how the chicken loop and safety mechanism work. We each have a go at putting on and releasing the safety, making sure we know exactly what to do when something goes wrong. As a massive worrier, this is really reassuring – learning everything step by step and practicing actually doing it using a trainer safety line attached to the side of the centre really makes me feel more confident about going into the water.

Samina picks out a 6m Airush DNA, we put our helmets on and walk down the beach… this is it! Once we get to the edge of the water Samina talks us through the different parts of the kite and how to check them all during the set up. We each have a go at holding the kite once it’s inflated, feeling how the wind fills it and making sure all the lines from the kite to the bar are untangled and damage free. Before we know it we’re ready to go, the kite is flying and we’re in the water ready to learn body dragging. Even though it’s only the beginning of June the water is much warmer than I expected and soon enough I’m bobbing around in the small waves excited for my turn on the kite.

Samina has explained the body positions and kite control we’ll need for our first body drag – the downwind body drag, and I feel confident in giving it a go (knowing she’ll be holding on to my harness and coming with me the first couple of times is still super comforting though). I take hold of the bar, get a feel for the power in the kite, steer it a couple of times and I’m away! Whizzing forward through the sea with a massive grin on my face… this is amazing! All the fear I had before I tried it (I mean, even the words body dragging sound scary) has gone and I can’t wait to give it another go. I try another few times and I’m really happy with my progress; I’m starting to see how my movements of the bar affect the kite and that it’s a lot more controlled and steady than I’d thought. All the images in my head of accidentally flying off to France have disappeared.

We’ve all had a couple of attempts at downwind body dragging so now it’s time to try directional body dragging, where we’ll change the position of our body and fly the kite using specific positions in the wind window to go across the wind, side to side along the sea. This is a little harder and we all crash the kite into the water a couple of times, which is great for two reasons; we learn how to safely relaunch the kite in the water and I learn it’s not nearly as scary as I’d thought to crash it – the kite doesn’t break and I can get it back into the air after a couple of tries.

After we’ve all crashed and relaunched the kite a few times, Samina shows us what we’ll need to do if we’re not able to relaunch the kite for any reason, and we learn how to pack down the kite and go through a self rescue procedure. We learn how to safely ensure the kite won’t power up and drag us away and how to wrap away the lines. We even learn how to use the kite as a sail or float to safely get back to shore if we’re injured. It’s a lot more methodical than I realised and I like that; going through each bit of the theory and safety procedures makes me feel much happier about eventually going out in the water on my own. With the kite slightly deflated and rolled up, we pick up the kite and head for the beach… we’re going to learn how to correctly pack away the kite.

Samina shows us step by step how to untangle the lines and roll up the kite, remembering to pick up our bag and pump we left on the beach and checking we’ve not damaged the kite in any way before putting it away. With all of that done we start walking back to the centre to wash our kit and store it, and on the way Samina chats to us about what we’ve managed to achieve today and what the next day of the course will include.

Back in my own clothes and stood inside the centre shop, Samina gives us a couple of fliers with information and a link to a website we can look at to recap what we learnt today before we come back for Day 2. She tells us we all had great kite control and we’re super happy – you can tell by the grins on our faces. I pop back into work mode for a few minutes and chat to Gedi and Brad about booking them in for their next lesson, then before I know it it’s all done… my first day of kitesurfing lessons is finished and I can see why people get so hooked on this; it’s unbelievably fun! I thank Samina – she’s been patient and enthusiastic the entire way through the lesson and a great teacher all round. I already can’t wait for Day 2, where she tells us we’ll learn some more different body drags and even work on standing up on the board!

For anyone considering learning to kitesurf I’d absolutely recommend the beginner’s course, I ache a little now and I’m ready for a hot chocolate, but I’ve definitely found my next hobby. I hope I’ve inspired you to give it a go and can’t wait to tell you all about my Day 2 lesson… maybe I’ll even be with you on it!

To learn more about our Kitesurfing Beginner’s course or other lessons you might be interested in, pop over to the kite school section of our website here or give us a call on 07563 763046.

10 simple steps to repair a leaky valve

Nobody wants a leaky valve but unfortunately with time, it happens… This is where the valve peels away from the bladder as the glue deteriorates and will result in a slow puncture. This is often discovered when looking for a puncture or if you wiggle the valve and hear a hissing noise.

Spare valves are sold at The Kitesurf Centre (£9.99) which already have an adhesive applied to them, just like a puncture repair patch. This saves buying a tube of Stormsure glue and makes for a quicker job with no drying time. However the whole process is outlined below in 10 simple steps for a standard valve replacement.

  1. Locate the leaking valve either by sound or if you can’t hear it, use bubbly water like you would for a normal puncture (Check previous post).
  2. Remove the bladder with the leaky valve. If it is on a one pump system, then remove the connecting tube if needed. Again, DON’T forget to tie a long string onto the valve or bladder if you need to remove the strut completely. Then you can pull it back through easily.
  3. If there is only a small leak then you can leave the valve in place and bung up and glue over the hole with Stormsure glue, however it is usually a sign that the rest of the glue is about to go too.
  4. If it is a large leak or you want to redo the gluing, remove the valve. It may be easier to heat it up using a hair drier first.
  5. Clean and sand the valve and bladder where it was attached.
  6. Apply a thin layer of glue around the base of the valve.
  7. Squish it back into place, making sure the bladder isn’t stretched or crumpled underneath the valve. It is best to put it on a flat solid surface for this and leave it here for drying.
  8. Apply pressure on the edges of the valve; an upside down shot glass normally does the trick.
  9. Weight it down and leave it to stick for 6 hours.
  10. Put the bladder back in and make sure there are no twists. Inflate and test.